Blog

The 2025 Planetary Parade Seven Planet Alignment from Scotland

The Planetary Alignment on the 25th February from my backyard in Perth, Scotland

Viewing and imaging the Planets

What a sight we have in Scotland’s dark night skies right now, with multiple planets on display, some of them being imagable. (This should also be viewable from most places in the world). What the media doesn't explain is that some are not exactly going to be naked eye visible. Technically speaking we can ‘see’ seven planets right now - Mars, Jupiter, Uranus, Venus, Neptune, Mercury, and Saturn, will all be briefly visible in the early evening south facing sky. In this image, we can see the faint milky way arcing across the centre of the image up to the top right. This is as you can imagine, an extremely densely packed area of stars. The dark grey patches on the right of the image are caused by interstellar dust blocking our view of the stars behind it. This is why here the image appears to be void of stars and takes on a patchy appearance.

In the night sky the planets follow a curve in the sky that matches the sun, called the ecliptic. (Think of this like the plane of our solar system). Above the milky way areas at the top left, we can see the planet Mars in the constellation of Gemini with the supermassive stars Castor and Pollox to it’s left, then Jupiter on the right above the "V" shaped constellation of Taurus (You can see the arc of the ecliptic I mentioned earlier by simply joining the dots here). As you can see, the recognisable Orion is nicely nestled between the houses too at the very bottom. Uranus is just below pleiades (the blue star cluster on the right) however it is too tiny and faint to see unless viewed on a magnified version of this image, or with a telescope / binoculars in very dark skies or with someone in ultra dark skies, who has good conditions with perfect eyesight. Even then, it will appear as a small dot in our vision. If we could pan right from this image (which would be looking west, out of shot), we could see Venus on the lower horizon and Saturn not far away.

Our eyes can interpret only 0.0035% of the electromagnetic spectrum. Because of this, the reality is, we see next to nothing of our beautiful cosmos, however we can begin to see a glimpse if we try to adapt our eyes for the night. In this game, it is best to leave misconceptions about our own eyes being truth-seers at the door and open our minds to what could be out there, and what is out there when we observe the night sky.

Dark Adaption

It takes the average human eyes about 45 minutes to become dark adapted at night, however studies show that improvements in night vision can occur for up to two hours! Any artificial light immediately damages any adaption our eyes have made and we have the start the clock again. So get off your phone! We don’t see much at all at first when looking up at the night sky. However, our eyes are capable of seeing fainter starlight, planets or aurora if we allow them time to adapt to the darkness. The purkinje effect describes the situation in human vision: as light levels decrease, the perception of warm colour drops, especially the red end of the spectrum. It is very important to observe the night sky with dark adapted eyes for this reason. To properly have our eyes adjusted for light levels this low, one must observe for at least 30 minutes and avoid all forms of artificial light during that time. This is a much longer time than most people give it. This is why many struggle to see colour in the night sky. Contrary to popular opinion, stars are not just little white dots floating out in space. Here is a picture showing the variation in star colours and planets shot recently showing the alignment from a rural setting:

The Planet Parade over Scotland, 1st March 2025. This image is a huge mosaic spanning a field of view over 200 degrees. It was made with a Tamron 35mm f/1.4 Di USD lens. Top left: Mars, centre: Jupiter, and lower right horizon: Venus. (Pinch-zoom on mobile to see details)

About the Image and How to Find the Planets

I am lucky to stay in a place where light pollution is less than in most residential places, relatively speaking. The camera and lens used to take this are extremely powerful equipment. The headline picture in this article is made up of about 10 seperate images and took me hours to painstakingly join them all together to produce this final result. To form this image, I used a Star Adventurer Star Tracker and a Nikon Z8 camera. The lens I used was a state of the art Tamron 35mm f/1.4 Di USD, wide open at f/1.4. Each exposure was 30 seconds, set at ISO 64. I then took a series of images to form a panoramic of the ground with the star tracker off to get this final picture you see here. Weather permitting I hope to see and image this again from a rural perspective tomorrow night (Thursday the 27th February 2025), and if not, it looks like I might get a chance somewhere rural on the Saturday of this week. You will of course still be able to see most of these planets like this for the next week or so. The best two to see in my opinion are shown here, which is why I concentrated on this part of the sky, rather than making a ultra massive, wide panoramic image and everything then becoming lost within the wideness of the vista. Mars on the left side is particularly interesting. If you let your eyes adjust and become properly dark adapted, you will easily see it’s glowing orange colour. I find it fascinating to let my vision slowly adjust, so much that I can discern planet or star colour. That’s pretty amazing I think.(Remember, darker skies will greatly help here). This process is obviously helped by being in darker skies, away from streetlights and the further from any towns or cities, the better. As mentioned, my advice is to go somewhere as dark as possible to increase your chances, and to always allow your eyes to become properly dark adapted. This alignment is best seen early evening just after sun set, in the south facing sky, extending west through east. (Consider that this image is looking practically directly south). This alignment of the seven planets will not be seen simultaneously so well until 2040. If you can visit an observatory under clear skies, or can go somewhere rural with your naked eyes, or a telescope / binoculars, you are in for a treat. Good luck if you are out hunting.

NB: On mobile, pinch zoom on the image to see closer details. On desktop, click the image for a larger view. If you check my instagram you will be able to see a video demonstrating this all here.

Steve

Tracked Sky Image earlier in evening with Nikon 14-24/2.8S lens at 14mm. Mars is on the left next to the blue/white stars Castor and Pollox in Gemini, to the right the white blob is Jupiter, found in the ‘V’ shaped Taurus Constellation

Sigma 14mm 1.8 Art lens with Nikon D810. A 114 degree field of view of the spectacle

The Best 35mm Lens Ever Made for Astrophotography: Tamron 35mm f/1.4 Di USD

Star Adventurer Mount and Nikon Z8 with Tamron 35mm f/1.4 Di USD

Introduction

Sometimes a lens comes a long that is a game changer optically. As much as I strongly dislike that phrase, there is simply no other way to describe the level of perfection this lens achieves, in particular with starlight, however it also excels across other genres too. This lens came about in 2019, when Tamron instructed it’s team of optical engineers to design the best 35mm lens they could. And they achieved just that. Some might say, ‘oddly’ for the usual DSLR mounts. Why not mirrorless? I don’t know, or care, because for me it’s actually an advantage; I shoot across mounts. I use lenses on DSLRs and on mirrorless, so I simply use the Nikon FTZII adapter to use it on my Z8 body. It is important to note that Tamron have been around a long time and have vast experience to draw on; they were founded in 1950. Many lenses for the big camera companies have been Tamron designs. (One that comes to mind is the Nikon 14mm 2.8D lens which was outsourced by Nikon to Tamron for it’s design).

Why A 35mm Lens For Astrophotography?

I hear this from so many people. I think the confusion comes from the thinking that wider is better. Well that really depends…35mm lenses have huge advantages when making panoramas (or better termed, mosaics) of the night sky. Due to general low distortion that these lenses have, coupled with their fast apertures, makes them sensible lenses to collect the strongest signal from each area of the night sky in order to build a proficient picture. They are also excellent for isolating a deepsky object or constellation, or even aurora that is low on the horizon. Read here for more information. While a 35mm prime lens will include less angular view of the night sky than a wider lens, it has the huge advantage that it collects vastly more light due to it’s large clear aperture size compared to wider focal lengths and apertures:

Planetary Alignment on the 26th February 2025 showing Mars (top left) and Jupiter (lower right). This image is a mosaic of 5 individual sky pictures using the Tamron 35mm f/1.4 Di USD lens on a star tracker.

Fast Aperture Lenses

To capture faint starlight, we want the fastest lenses we have. In terms of light collection, some of the most efficient lenses at gathering light are between 24-50mm and with an f/1.4 aperture. This is due to clear aperture size (the amount of light a lens collects is based on it’s aperture and focal length. We have to remember that aperture is a ratio, thus it is affected by the focal length of the lens. A 14mm 2.8 lens does not gather anywhere near the same amount of light as a 50mm 2.8 lens does). To work out a clear aperture size for a lens, we take the focal length and divide it by it’s aperture. Thus:

For a 24mm f/1.4 lens we get:

24 / 1.4 = 17mm diameter of clear aperture

For a 35mm f/1.4 lens we get:

35 / 1.4 = 25mm diameter of clear aperture

Now let’s look at something that everyone jumps onto when shooting the night sky, or aurora. Ultra Wide Angle lenses. Now they can have some advantages, however, with regards to light collection, let’s look at the numbers:

For a 14mm 2.8 lens we get:

14 / 2.8 = 5mm diameter of clear aperture

Since clear aperture is a direct correlation of the light collection abilities of a lens, we can deduce that ultra wide angle lenses are not necessarily the best as everyone thinks they are, and 35mm 1.4 lenses are actually one of the best we can get, with 25mm diameter of clear aperture up for grabs. In contrast, ultra wide angle lenses collect ridiculously poor amounts of light compared to longer focal lengths, even when they have fast apertures (remember, it’s a ratio). However, I hear you say, ‘they let me shoot for longer because the Earth is rotating,’ etc. Yes of course. They can partly compensate for apparent star motion. However, test out how much brighter faint aurora comes out with a 24/1.4 or 35/1.4 lens and you will see what I mean here. Ignore star motion for a moment and take a 35/1.4 shot for 10 seconds, then take a shot with a 14/2.8 for 10 seconds. Notice how much darker than 14mm lens is? For further reading on this subject, please see here.

Lens Characteristics

The Nikon version of this lens comes in at 805g. It comes with a lens hood that is lockable and well made compared to the Sigma 35/1.4 version I shot with for years. One reason I sought another 35mm was I had two separate Sigma 35mm f/1.4 lenses go bad on me, and my equipment is babied. Two went decentered and even despite sending to Sigma, they never seemed to get it right again. So I bought another, as I generally liked the lens, and low and behold about a year later it occurred again. Something was definitely up here; I was done with that lens by then. It should be noted, I treat this a strange unexplainable occurrence. I shoot with the 14mm f/1.8 Art and have never had issue. I can only assume there is something poor about the lens element glue within the lens; something is moving over time to cause these problems I encountered. The Tamron has a 72mm filter thread and is just over 100mm in length. and 80mm in diameter. In short, combined with it’s weight it’s neither huge nor small. I would go as far to say that for what it does optically, it is fairly compact. It is much smaller and lighter than the Sigma 40mm f/1.4 Art (1260g!). It has a special fluorine coating on the front element to repel dust and moisture and make it easily cleanable. It comes with a manual - autofocus switch on the body of the lens. Autofocus on my D810 (and Z8) is very good. There is much less variability that plagued the Sigma 35mm f/1.4 I came from; consistency is back and it is very welcomed. Autofocus is also quick (for a 35/1.4) and not too noisy. It has nine aperture blades with a circular diaphragm which actually produces nice sunstars with 18 points around light sources. It stops down to f/16, and has a minimum focal distance of 30mm. It feels solid in the hands and well built, even better than the seemingly already good Sigma 35mm f/1.4 that I came from. However, compared to the Sigma, optically it is in a different class:

Optical Excellence

Tamron released the 35/1.4 in 2019 as the 40th Anniversary of their ‘SP’ (Superior Performance) range of lenses, and stated it was the best Tamron lens ever made. It’s easy to see why once you get your hands on it. This lens also represents to me the best balance of painterly, artsy, rendering while meeting demands for critical applications such as astrophotography where we need things like astigmatism, chromatic aberration, coma, and other aberrations under tight control. Let’s look at how good the Tamron is by examining the MTF chart for the lens:

MTF (Modulation Transfer Function) curves describe to what extent the tested lens can faithfully reproduce contrast of the subject in images it captures. The closer the 10 lp/mm (line pairs per millimeter) curve (the thick line for low frequency) in an MTF chart to "1" of the vertical axis (the higher up), the higher the contrast reproduction performance of the tested lens will be. The closer the 30 lp/mm curve (the thin line for high frequency) to "1" (the higher up), the higher the resolving power and thus the subjective sharpness of the lens will be. The closer both the solid and dotted lines are to each other indicate a better control of astigmatism.

Lens performance differs depending upon directions. Solid lines show performance in the sagittal (radial) direction while dotted lines indicate performance in the meridional (circumferential) direction. When sharp lenses capable of delivering uniform optical performance over the entire image field are tested, MTF charts show curves plotted in good balance.

Performance characteristics of photographic lenses cannot be expressed with only MTF charts. There are other factors that are expressed in different methods, such as taste of softness and degrees of compensation of various aberrations. But you can use MTF charts as a general scale to measure lens performance.

Controlling the Aberrations

The major aberrations that degrade images in astrophotography are well known to us. Astigmatism causes point light sources at the edge of the frame to appear to stretch in a line, and it is something that nearly all fast wides have. Some are almost unusable wide open for this reason. Coma (or Comatic Aberration) causes point sources of light at the periphery of the image frame to elongate into comet like shapes. Chromatic aberration causes colour shifts around points of light at the focal plane, causing white light to split into it’s respective colors of the rainbow. Most fast lenses will have this to some degree, and it will often be more prevalent in the corners of the frame. Spherical Aberration will cause point sources of light to show soft, symmetric halos. SA will usually be noticeable throughout the entire image, and not just the corners as some other aberrations. Distortion will bend straight lines and cause imperfections more noticeable on man made structures. Vignetting will cause the edges and corners to appear darker than the central portion of the image. Field Curvature tends to be more often seen in older optical designs but can still exist, to some degree in modern designs. This shows up as softer areas of the frame, sometimes about one third out from the central portion. Flare is something that is going to affect daylight shooting more than astrophotography, however I am pleased to note this is under very good control also.

The Tamron 35mm f/1.4 controls all of these aberrations exceptionally well in a vast balancing act. This image below shot on a starfield accurately depicts how good it really is - if you are on mobile, pinch zoom into the far corners of this and prepare to be amazed:

Star Quality - Tamron 35/1.4 wide open, singular 6s exposure at ISO 400

Notice how, there is no real enlargement of the stars at the far corners or periphery, even on very close examination. This shot was a singular test shot from my backyard recently. I have not done any corrections; this shows the natural, easily-correctible lens vignette, and tiny touch of chromatic aberration which is easily removed in post processing. Notice further that the stars are sharp, there is no spherical aberration noted and no coma either. Star colour is picked up well with this lens when proper exposures are used to record them (more noticeable on non-moon evenings). This was a f/1.4, six second exposure at ISO 400. The truly beautiful thing about this lens is that it can be used wide open at f/1.4. Stopping down mainly reduces the vignetting in the corners, and ever so slightly improves the corner stars even more than their already exceptional performance wide open. Focus is critical with a fast 35mm prime lens such as this. Especially one that is so highly tuned right into the corners. This means, a hair back or forward on the focal ring can dramatically fine tune star shapes. You do not want to mis-focus with this lens.

Orion under Moonlight in my Parents Backyard - ISO 64, f/1.4, 6s

Closing Thoughts

I have only recently acquired this lens and have only had moments between moonlight and cloud to test it to the full. Despite this, I can already see it is going to be a huge improvement over my previous lens of choice for this focal length. As I shoot more with this lens, I will come back and further add to this article in due course, hopefully updating it with some more pictorial examples.

Landscape Photography and Shallow Depth of Field - F/8 and Be There?

Shallow Depth of Field in Landscape Photography

Introduction

The established convention when shooting landscape photography has always been to shoot significantly stopped down, that is, using small apertures. The reason for this is to increase depth of field: the amount of area in clear, acceptable focus within the picture itself. Whilst I do use F/8 a great deal, I use and consider other apertures often, for different reasons and have also for some years been going completely against convention and shooting wide open with prime lenses in landscape situations. This is not about just trying to be different or go against convention, and more about using an aperture and design for the shot that creates the strongest overall picture with all things considered. I note that there is a new craze in landscape photography to have complete front to back sharpness in a picture, which to me looks very unnatural and a little plasticy - faked, because it just is not how our eyes work.

What Does Shooting At Small Apertures Do? (F/8 - F-22)

Shooting at small apertures achieves several things:

  • Increases the depth of field within an image.

  • Allows longer shutter speeds in lowered light, or in bright light in combination with the use of a Neutral Density filter.

  • Usually allows the photographer to achieve a good across frame sharpness, as most lenses are extremely good by the time they are stopped down, even ones which are softer wide open.

  • If stopped down excessively, it can incur diffraction which causes image softness. (I’d still shoot here for the right reasons, just be aware of this). On full frame, diffraction effects come into play more around F/11, for crop cameras, at about F/8.

  • Normally allows diffraction spikes, or sunstars to appear around points of light with good landscape lenses.

  • Decreases lens vignetting.

  • Decreases risk of lens aberrations showing up.

  • In many lenses, causes increased risk of flaring between lens elements. This can sometimes be used creatively.

What Does Shooting at Large Apertures Do? (F/1 - F/5.6)

Shooting at large apertures achieves several things:

  • Decreases the depth of field within an image.

  • In general, allows faster shutter speeds across the board.

  • Allows a photographer to select an area of greater interest, ie the subject and further direct the eye within the shot.

  • Prevents diffraction effects within the depth of field / focal plane areas.

  • Increases lens vignetting

  • Increases risk of lens aberrations showing up

  • Reduces the risk of flaring.

As mentioned at the beginning of this article, I have for some time been questioning this standard F/8 approach to landscape photography and if honest, have become a little bored with the same by the numbers shots and apertures. My ethos for the most part (there are exceptions) is that I do not focus stack. Focus stacking often produces really unnatural ‘digital’ looking pictures because everything from the closest corner to the sky miles in the distance is in focus; there is no depth. Even where shots require a smaller aperture, say F/8 with a 24mm lens, this will not give front to back sharpness with an object near to the camera. In these situations, I often let the close corners, and the very close foreground be slightly out. I don’t want people looking right down there, I want the eye to come up to the subject and flow through the image. Sometimes the problem is we include too many subjects in our photographs and make the scene overall too complex when we should be distilling things down for the viewer. In photography, we direct the eye through a shot to our subject in many ways, including; brightness, sharpness, contrast, composition. We can also use that depth of field to be a further visual clue. Most of us have been subjected to the cliché daisy and mountain landscape shots that are paraded over the internet. Just google it and see what I mean. Notice how unusual it feels to have daisies, or wild flowers so close to the camera all perfectly in focus (and unnaturally brightened too), however also have the distant mountain seemingly be in exactly the same plane of focus? It’s just not how our eyes work. We sense this and it feels fake. (Most of the time the processing of these shots doesn’t help either, because the photographer uses very restrictive masking selections and overbrightens scene elements). For more reading on this concept, see the article I wrote on ‘Realism in Landscape Photography’ here.

When Is Focus Stacking A Good Idea?

Perthshire, Scotland. Nikon 14-24/2.8S

There are of course times when focus stacking is the way to go. Notice this shot from Perthshire of Black Linn Falls in Autumn. This was shot with a 14-24/2.8S Z mount lens at 14mm. If you believe what is said online, you would think that this scene, shot at this wide of a focal length, could simply be shot at f/8 or f/11 to achieve the result you are seeing, but you would be incorrect. This is a two shot focus stack, one on the very foreground rock at f/11, and one of the distance at f/8. This allows me for this scene, to achieve a good depth of field up at the bottom front rock area which has interest here. Why did I feel this necessary? Well, it’s part of the shot, and thus it tells part of the story, in addition it is also quite bright in the scene itself. Of course I still want the viewer’s eye to flow from the bottom upwards, which I think it does here. Conversely, it doesn’t make a huge amount of sense if we concern ourselves with the near foregrounds in shots like this:

Isle of Skye Scotland, Nikon D850 and 20mm 1.8G at F/8

The very nearest grass roots, and the dark corners are not somewhere that we need the eye moving to. Thus it is realistically counterintuitive to focus stack, especially if you consider wind and moving long grass. It would not have added a single thing to the final picture. Let’s have a look at another shot which shows more exaggerated falloff in the front of the frame with regards to obvious loss of depth of field:

Depth of Field used to Drive the Eye down through the image, with a twist

This was a long exposure shot taken in summer 2020 by my then nine year old son (with a little help composing) on his D200 with a 20mm 1.8G nikkor lens. Like me, he was quickly fascinated by the effect a long exposure could provide in an image and took to it very well. I love the layers in this image, we have the obvious falloff in the corners and around the rock, but because the pool is a reflection and the tree lines at ‘infinity’ it is in sharp focus, with an unsettling hint of blur at it’s edges. We know where we are supposed to look, and the aperture reinforces this. We could have focus stacked. It would have required a good few extra frames in this example, because we where right on the ground here and ultra close to the foreground elements. However, would it really have added anything, or just taken away from the mood here? This is an interesting case. because although this isn’t really shot at a large aperture (he used F/9, and consider the D200 is an APS-C sensor camera), it still creates a very shallow depth of field effect because he was so close to the rocks, and the aperture will not be able to bring this area into sharp focus (consider the minimum focus distance of the lens too). Finally, let’s look at the headline picture in this article:

35mm 1.4 Sigma Art

So, why am I using such a wide aperture here in this picture? Why am I not at f/11 for this scene, considering I am at a 35mm focal length and focus stacking? Well the real question I ask is, what would it have actually added? The foreground is dark, and it is better serving as a context and visual frame. This is a good demonstration of shallow depth of field used effectively within the constraints of the landscape photography genre. This particular shot was made with a 35mm f/1.4 prime lens, which was shot at f/1.8. There are several things to note here. The use of the prime is important, because we are going to be able to control the foreground blur more. In addition to this, because of the larger aperture, it will have more pleasing out of focus elements than it would be on a f/2.8 zoom lens, in terms of quantity and quality of that blur. (Note, I have upgraded to the optically superb Tamron 35mm f/1.4 now).

Further to these two points, the vignette which exists naturally at these wide apertures also further directs the eye, and places the foreground in further shadow. One thing I find landscape photographer’s do not consider much is that large vignette’s can be so effective when shooting landscapes. Using a class leading DSLR or Mirrorless body and a fast prime which vignettes decently at large apertures, allows me to control dynamic range even more effectively; it’s actually a boon, not a curse. This pushes the brightness of bright skies and white clouds down a good bit, further balancing the exposure and allows me to often capture the full range of light in a singular shot without the need for exposure blending, tripods or graduated neutral density filters. This leads me to another advantage. Sometimes I am so tired of tripods, in these conditions I grab one or two primes and head out to craft pictures. Yes, this shot was made completely hand held.

Final Thoughts

The next time you think that F/8 and be there is the only way, which is the accepted phrase for ‘use small apertures, Jim’ consider that their are other, arguably more effective ways to build a picture on a case by case basis. I often bring a 35mm prime with me in addition to a 24-70/2.8S on most trips as it allows best access to this technique. Even despite the fact that I have used a prime lens here, as I have shown in this article, even F/8 apertures will produce out of focus foreground elements when used close to subjects, giving an effective visual clue in an image to direct the eyes. I don’t want to sound like some of these youtubers with their “You Don’t Need A Tripod’ videos, because that is a nonsense also, however it is without a doubt a definite and effective technique to use in the field.

Shooting For 3D Pop; Why I Use The Lenses I Do

Longing to be Held Again - Canon 5D with EF 35mm f/1.4 Version I shot at f/1.4 (Courtesy of fprime photography)

Introduction

I think if we look at most shooters who own a modern camera body or two, many are absolutely aiming to work with the most optically perfect lenses that they can to use on the system. (For astrophotography and most of my landscape work, this is also my priority for the most part). This however is not always required, there are other considerations such as size, weight, and what is optically appropriate for the task in hand. There are other genres where I honestly think: we are shooting people here. Why are we going for that ultra digital, super-sharp look on a face? No one wants that; people don’t want that. They don’t want to see themselves in that extreme cold, hard light of day. We might even take that thinking further; what if we consider that some lens designs may not actually align with our shooting goals. Perhaps the lens designer has made a lens to be ultra sharp, with a really flat and even plane of focus, the ability to have a sharp drop off in the focal plane to bokeh, having low distortion and no chromatic aberrations, no coma, no field curvature or astigmatism, and displays that ultra sharp look from the widest aperture and all the other things that we now consider good in an optical design. Essentially they might have taken out absolutely everything that when added up, we used to refer to as ‘character’ or ‘pleasing rendering’. Further to this, many of these things when present in an image with a myriad of other depth cues, can in my opinion aid a photograph appearing more three dimensional than perhaps a lens that was made to perform amazingly well in another area. This could resultingly trip the effect which seems to have been coined in the photography world: ‘3D Pop’. So it might be said, that stripping some of these things out of a lens and making it closer to perfect, that we might lose something in terms of how well it can convey depth in a 2D scene.

I have mentioned before on this blog that I have an affinity for older lenses on the Nikon system since using a D700 camera way back as far as 2010. Despite many on the internet who decry old lenses are outdated and therefore no use to anyone anymore, it is clear that they don’t understand how this can contribute to a picture in the look they impart onto the taken frames. Everyone is going to have their wants and needs, and we will always find people whose needs align with our own. I shoot a mixture of highly ‘optically corrected’ glass, as well as a whole bunch of lenses which are anything up to about 35 years old. My approach to portraiture; (includes weddings), in the photography of ‘stuff’ or ‘ things’ is that I prefer to use older glass over the latest prime lenses, there of course some exceptions. Call it flaws, optical imperfections, sometimes even choppy bokeh. Call it a ‘film rendering’; Call it whatever you want to call it. I happen to like it, and it all differs across lenses. If I’d have shot some of the pictures I take with old primes with my 24-70/2.8S they might likely be a little sharper (but really only properly noticeable on 100% crops), however they would have been lacking in ‘character’ which can be really impactful. These qualities, unlike ultimate image sharpness, are actually noticeable from tiny thumbnails. I have noticed that many older lenses, which are imperfect optically, can in some instances, encourage a really good 3D effect than some more modern optically ‘perfect’ ‘flat’ glass. There are also some modern designs which might be more akin to my thinking from Zeiss and Nikon in particular. This article was written by myself and another photographer friend who prefers to remain nameless, however has a great interest in shooting with lenses and using techniques that help attain a 3D effect, otherwise known in the photography community as ‘3D Pop’.

Examine this extremely good example of 3D pop here from Stm Geist:

A Stunning example of 3-Dimensionality in a 2D image (Courtesy of Stm Geist)

Consider the subject distance to the camera here, the light on the subject, the leading lines with inclusion of the ‘floor’ and a distant background to aid depth cues, the relative size of dog vs girl in the background. Notice the ultra slow and smooth focus plane transition? The subtle, ever increasing bokeh. Notice also, the spacing around the subjects to allow a sense of depth to occur, the fact that the girl is placed between the out of focus trees behind her (a very nice touch). These are just some of the elements conveying depth in this striking scene.

The Illusion of Depth in a Photograph

All conventional photographs are of course 2D representations of 3D scenes. However, our brains can create the illusion of depth based on cues from the image. Consider the Ames Room, one of the very life-sized demonstrations of perspective which produces an optical illusion of differing size and depth. Because the room is made in a distorted way, the viewer looks through a peephole into the room and sees one person of similar size, appear much smaller than the other. This is because the distorted shape of the room physically allows one of the participants to be further from the peephole (and often lower):

The Ames Room optical illusion by user Mosso on flickr (used under CC licence)

3D Pop

3D Pop itself has been established in the world of classical art for a long time. For several centuries now artists have added subtle visual cues to their two-dimensional paintings to impart the impression of physical depth. These traditional painter's "depth cues" have included occlusion, shading gradients, perspective, and converging lines among others. Look at the headline picture in this article at the top, which in my mind, trips a very strong impression of depth by using concordance of many factors in order to do so. Here's the working principle for 3D Pop...the illusion occurs when a sufficient number of concordant depth cues in a 2D depiction trigger an illusion of three dimensions for the viewer. If the recorded depth cues are too few, too weak, or have too little concordance between themselves, then no illusion is created. So generally you want to leverage as many depth cues as you can when shooting.

We can start by reviewing the depth cues that artists have used for centuries in paintings that have been applied to modern artworks:

Don’t Fall in - Extreme 3D Street art Courtesy of Edgar Mueller

Strong 3d Effect that the eyes cannot ‘Fix’ - Extreme 3D Street art Courtesy of Edgar Mueller

Edward Mueller is a street artist that I rediscovered when writing this article. He kindly gave permission to use these fantastic pieces of art here. I wanted to include these two pictures at the start of my article as they show how powerful a strong 3D effect can actually be. So strong in fact, that the second picture looks utterly faked. Our eyes cannot reconcile that the girl is ‘floating’ on top of the canyon of ice. How come she has not fallen to her death? The brain searches for the ground, but cannot find it. She appears to be floating. We have been successfully tricked, the illusion is real.

Have a look at the following image, shot on medium format with a lens known to be able to easily produce good depth rendition. I feel it renders the scene with out of focus blur transitions that mimic my own vision in real life. Notice it is not a ‘bokeh shot’, and the background the scene is recognisable despite in slight blur. Add the traditional depth cues of converging lines (from the pathway and train) to the concordant lens-driven blur transitions and voila...strong 3D Pop is conveyed to the viewer:

Railway Man - Pentax 67 with Super Takumar 105mm F2.4 @ f/3.5 (Artist Unknown)

In photography additional depth cues are made available as imaging a subject through a lens allows the photographic artist to record unique, lens-driven depth indicators. These include control over depth of field and its resultant out of focus (OOF) blur, the actual bokeh quality of that blur, the quality of the OOF transitions, and the rendering of lens micro contrast to confer subject shape and dimensionality. There has now been the suggestion of a thing called ‘flat glass’ in both cinema and still photography. Some of these lenses could be described as scientific, ultra sharp across the entire frame, having superb control of all or most noticeable lens aberrations, little distortion or field curvature, and having smooth bokeh. Watch this fantastic 3D pop demonstration video by the hilarious Casey from Camera Conspiracies here.

It is important to realize that the illusion of 3D Pop isn't an on/off quality. It exists to varying degrees in virtually all photographs dependent on how many concordant depth cues are working together in the image to render the perception of depth. The more concordant depth cues there are, the stronger the 3D Pop. And the stronger the pop, the greater the percentage of the viewing audience the 3D illusion will be triggered in.

Some lens depth cues are recorded automatically in photography and, as such, virtually every photograph has some low-level of 3D Pop. It is important to note that 3D pop can occur in lenses older and newer. I tend to see it more in older designs as undercorrection of aberrations tends to increase the 3D effect to me. There are many factors which are lens and non lens driven that can do this.

3D Pop are two (or three), almost dirty words now in the optical community. Before a certain Photographer came along and got us all discussing this online, it was a term coined way back, commonly used in the Leica / Zeiss community to explain the three dimensional look a lens could help impart onto a scene, when the other elements such as light, composition, depth of field, leading lines, contrast, vignette, etc all came together. For Zeiss pop, from what I read it was probably more about lens contrast / micro contrast when they referred to ‘pop’. It started off being discussed in terms of lens element counts in more recent times. This was mostly debunked, however there is some evidence that more glass is impactful on the blue end of the spectrum of light; however optical designers clearly know this and for the most part have balanced it by improving coatings so that they could negate the cost of adding more lens elements into more complex optical designs. So we are almost back where we started. But are we? Are their actual reasons some lenses seem to aid a strong 3D effect over ‘flat glass’ designed in such a way to achieve a better optical perfection? Why else am I shooting with an ancient 35mm lens, when I own the latest optically perfect version? Well, sometimes it’s definitely size and weight. However, it’s more than that. I’m often choosing these lenses for their look. This is not going to be a side by side scientific A-B test. Having owned most of my lenses for a long time, I simply know all of their strengths and weaknesses. I have always stated it is important to use what you feel works for you personally. Ignore others and listen to your inner voice. I’ve never been bothered by lens aberrations for this style of shooting. I know it bothers a huge swathe of the brainwashed sharpness and noise obsessed photography community though. We can’t have mistakes in our lenses. That just cannot be!

Strong 3D Pop - (Artist Unknown)

So did we get anywhere with this 3D pop thing, after most sensible shooters conceded that this effect wasn’t really anything to do with the number of lens elements in a lens? (We know this for a fact, because there are some high element count lenses that still seem to aid a 3D effect). We of course have to concede that this effect is very scene dependant too, (no lens or light will really make a flat front facing brick wall appear 3D) as mentioned, and there are a lot of factors that help trip the illusion so that a two dimensional picture appears as 3D to the viewer. Along with others who I have known and shoot with, there are just certain lenses that tend to favour the tripping of this affect over others, and consistently so.

3D Pop is the illusion of depth in human perception. Some people can see it, others not. It can be a ‘once you see it’ type thing.

How do we get the 3D pop effect?

Lens Characteristics and Focal Length

Lenses which contribute to tripping the effect are going to be somewhere between 24-200mm on 35mm format. The reason for this range is that, super long telephotos lenses normally are not the best lenses to convey depth to a subject, and can sometimes leave a subject looking flat against a bokeh background. If we use a longer focal length lens, we must be careful to not be too close, otherwise we will just be getting bokeh if we fill the frame with most subjects. This will look less like a 3D image, and more like a green screened, stuck on subject: we don’t want that. Extreme ultra wide lenses can have the problem that they are ‘too wide’ and cannot impart enough subject isolation. Most agree prime lenses are best to get this affect. Many agree that certain lenses tend to trip the effect more than others, combined with the other factors below. Older lenses tend to have (but not always) more intrinsic distortion, which I have also found helps to trip the illusion of three dimensionality. Another large aspect of the lens’ traits is the focal plane transition. The FPT essentially wants to be extremely smooth and gradual, so that we emphasize the depth in the image, in order to help produce the best 3D pop effect in the picture. As you can understand, this is a characteristic of the lens itself, and may be a significant contributing factor of why some lenses do better than others with regards to depth perception, along with lens distortion. Another element of lens characteristics is the correction of optical aberrations in the lens itself. Things like distortion, field curvature, vignetting, coma, astigmatism, chromatic aberration, can all aid a 3D effect also, as well as how much contrast and microcontrast the lens imparts onto the scene itself. I have also found, that smooth ‘modern style’ gaussian blur bokeh can kill or subdue the 3D nature of the final picture at times. The below is a good example of this, the bokeh isn’t smooth, there is an almost mildly unsettling feel to it, which I like. Note that the focus falls off extremely smoothly and gradually into the background:

Car Pop - Nikon D700 with Kerlee 35mm f/1.2 (Courtesy of fprime photography)

Shallow Depth of Field

Zeiss at one time stated for many lenses they think have ‘pop’ that they have: "Brilliant optical design and a sharp transition to out of focus areas, creating a perfect distinction between the main subject and it’s environment." It's exactly the opposite we want here, (perhaps Zeiss didn’t use the right descriptor in ‘sharp’) and some of their lenses do this, as do many others outwith the Zeiss optical brand. It is noted: too sudden or sharp a transition between the focal plane and planes in front and behind said plane, produce a ‘cartoon,’ cardboard cutout 2D effect. Certainly many shooters regularly confuse 3D pop with shallow depth of field. There is some relation, but not in the way they consider it to be. Many think simply using a wide f/1.4 aperture and focusing on a subject that fills a considerable portion of the frame with bokeh behind it will suffice; but it won’t on it’s own produce a fantastic sense of depth in a photograph. What a good lens must be able to do is create a long, smooth transition from the focal plane to the background, maintaining a large microcontrast in the focus plane with a deep dropoff throughout the frame to the background. This effect can be visible even when shooting at fairly stopped down apertures. To reiterate, the effect does not and should not soley rely on depth of field, and certainly not ultra shallow depth of field; therefore, 3D pop is not necessarily related to very large apertures, or extremely shallow depth of field at all. That said, without a doubt some depth of field separation aids the effect, however more so when it is a formed in a subtle manner as stated here. As soon as we introduce a little shallowness to the depth of field, we begin to gain a separation of our subject from the background. I must state though that there is something about being able to still recognise the out of focus areas being an important depth cue.This is why to add to the previous point, prime lenses tend to be better than zooms to introduce this effect into your pictures, from the simple fact that prime lenses tend to have access to wider apertures, and can create shallower depth of field at distance to our subjeet than most zoom lenses can. To maximise the effect though, we do not want the subject to be too far from the camera that they are tiny in the frame; we also do not want them to be too close either. So it becomes a balancing act and is about considering individual scene geometry to get the best depth. As mentioned, in most cases, we also want the background to still be recognisable in order to convey a depth to the scene and aid three dimensionality. Completely bokeh-ing (technical term) the background can in most situations, have an adverse affect on depth, since this is not how our eyes view the world, and as mentioned, the subject will look like they have been green screened into the frame in front of the background. I am sure though, that there needs to be a gradual transition, be it by focus; contrast, brightness falloff or ideally all three, because all the good images that have a 3d effect have this in common. (See the fantastic pop in the Akita shot near the start of this article). This is the one criteria that differentiates 3D from just being pop from general scene contrast. So therefore, we should consider using other apertures than just the widest that the lens is capable of, infact I emplore you to do so. Lenses which are good in conveying depth should still be able to trip the illusion (sometimes they do it better), when stopped down for the reasons discussed here.

Give your subject space around them in the scene to aid the sense of depth. If you are right up and frame filling with the subject, including zero context around them, expect little resulting convayance of depth to occur. This of course, is scene dependant so judgement on our part is always required:

Framing Up - Nikon D810 with 35mm f/2D @ f/3.5. Even stopped down we have conveyable depth and pop in this image.

So now we admit that this 3D effect is not just about shallow depth of field as is commonly thought. As you will see, flat subjects, or subjects shot with extreme telephoto lenses, will normally display a relatively flat perspective in a 2D photograph. This stands to reason why most portrait lenses are 85mm and above - it is flattering to the face. It makes the features resemble how our brains form them, flatteringly so, because it physically flattens the face features as we are not close enough to introduce perspective distortion. It's not just that we can isolate a subject with a gradual fall off in depth of field. It's that the resultant bokeh can help your eyes place each item's depth in the image. Also note how the bokeh is in most good 3D shots are not creamy smooth and in fact exhibit double edges in some places. As I said: crunchy/choppy vs. creamy bokeh, really helps the subject pop out, alongside other depth cues:

Horse in School - Nikon D850 with Nikkor 35mm f/2D prime lens with pretty good 3D pop effect

Many shooters would decry the bokeh in this shot awful. I on the other hand like it. There is almost something unsettling about it here, that gives this picture an excellent atmosphere (see the first shot in this article which demonstrates this even more). I want to be very clear here: I state this as the owner of lenses with classically smooth and perfect gaussian blur style bokeh that has no edging, no choppiness, and can deal with any background. I also state this, owning many lenses that do the complete opposite. If you don’t see the pop in the first shot of this article, well heck: no one can help you. Before you go out and buy the big bucks sharp glass with the smoothest bokeh you’ve ever seen, remember you might be giving up a good bit of pop too. That shot was taken with the Canon 35mm f/1.4L Version I. It’s generally noted that version II corrected most of what we see in that first shot, and thus, has reduced it’s 3D ability in a general sense.

Light and Subject

It should go without saying that these are big ticket items. Without some directional light striking our subject, it’s going to be pretty difficult to achieve any sense of 3d on a flat plane. Subjects which have a depth into the frame, will also be able to experience the effect more than a thin object that inherently doesn’t have a great ‘length to breadth’ depth to display.

Voigtlander Aspherical VM 40mm f1.2 (Courtesy of Vlad Andrus, Romainia)

Lens Aberrations

I believe lens aberrations can have an effect on the depth within a picture. Particular big ticket items being lens distortion, and field curvature. Under the right circumstances, these two can play together to really bring a subject out from the 2D plane. The aberrations that form around the focus plane at faster apertures and at high contrast transitions, called spherochromatism, also do so. Of course I am speaking about the dreaded longitudinal chromatic aberrations, those green and purple colours that can lurk within our images.

The Camera

Medium format and other large format sensors are ‘said’ to produce this look easier than their smaller brethren. I mostly recommend full frame cameras over smaller crop sensors, as they aid the depth of field effects possible. See here.

Nikon 35mm f/1.4 AIS @ 1.4 (Courtesy of Tri Hong)

Image Processing

There is no doubt that the edit process can create / enhance the 3D effect. Effects such that add contrast (both colour and light/dark), especially between the subject and background, dodging and burning, adding vignette (or emphasising the lenses’ natural vignette) will bolster the impression of depth in a photograph. This includes using the ‘Brenizer Method’ to create a panorama from singular images - the bokeh panorama, which can be particularly effective:

Skateboard Boy - A Bokeh Panorama using an 85mm f/1.4D lens

Visual Cues Which Build Depth in a Picture

  • Linear Perspective - A method of depicting three-dimensional depth on a flat or two-dimensional surface. Linear perspective has two main precepts: 1. Forms that are meant to be perceived as far away from the viewer are made smaller than those meant to be seen as close. Parallel lines receding into the distance converge at a point on the horizon line known as the vanishing point.

  • Atmospheric Perspective - A device for suggesting three-dimensional depth on a two-dimensional surface. Forms meant to be perceived as distant from the viewer are blurred, indistinct, misty and often bluer.

  • Shadows emphasise dimensionality within any image.

  • Converging Lines - Parallel lines receding into the distance converge at a point on the horizon line known as the vanishing point.

  • Foreshortening – A method of portraying forms on a two-dimensional surface so that they appear to project or recede from the picture plane.

  • Pictorial Space - The illusory space in a painting or other work of two-dimensional art that seems to recede backward into depth from the picture plane, giving the illusion of distance.

  • Overlap Effects - Spatial relationships are achieved by placing one object in front of another. The object closest to the viewer blocks out the view of any part of any other object located behind it (or, where the two objects overlap, the one in back is obscured).

  • Relative Size - Objects appear smaller as their distance from the viewer increases.

  • Relative Position - We view nature from our own eye level. Objects in the foreground appear lower and distant objects appear higher relative to the imaginary line created by our level of sight.

  • Chiaroscuro - rendering of forms through a balanced contrast between light and dark areas. Effective in creating an illusion of depth and space around the principal figures in a composition.

  • Sfumato - From the Italian work for “smoke,” a technique of painting in thin glazes to achieve a hazy, cloudy atmosphere, often to represent objects or landscape meant to be perceived as distant from the picture plane.

  • Trompe-l’oeil - A French term meaning "deception of the eye." A painting or other work of two-dimensional art rendered in such a photographically realistic manner as to ‘trick’ the viewer into thinking it is three-dimensional reality.

Native Indian hand-woven basket in 3D, Nikon D700 with Kerlee 35mm f/1.2 (Courtesy of fprime photography)


But We Can’t Have Mistakes In Our Lenses?

Somewhere along the line, with computer aided optical design, engineers became able to run through many iterations of a lens design based on the parameters they wanted. It is no doubt that modern lens design is faster, more efficient, and offers more options in this vein. As larger megapixel counts and sensor densities came along, the general photography community has been in out-cry about any optical defects they can find. ‘There is a bit of green or purple near those areas of high contrasts!’ (I’m crying). ‘Wait, does that bokeh have slight outlining, good heaven’s, that simply will not do!’ ‘This lens isn’t even sharp when I pixel peep at 400%!’

I’d think to think optical engineers did what they did in isolation from the general chit chat on photography forums. They wanted to exploit all that sharpness, all that correction right into the corners, to be able to use lenses wide open, or just one stop down and get those corners really useable. Occam’s Razor suggests this is how it went, and with modern design they are certainly able to fix the lenses of old. Lenses like this have absolutely come about because of the push for high megapixel sensors alongside the abilities of modern lens design which did not exist 30 years ago, which in a way is market driven because the photography community has not had much advancement in 10 years to actually sell it’s products. Mirrorless and more megapixels is about our lot, most of the time, because I like many, do not see huge innovations, not really. This in part will be due to the revenue and investment available in these photographic items. This said, in making these lenses available, we absolutely gained tools suitable for certain applications, such as astrophotography and landscape photography. (Consider for example, just how good the Tamron 35mm f/1.4 is for astrophotography work. It is utterly class leading and without comparison. On starfields, it has no aberrations other than some light chromatic aberration. Stars stay as little points right into the absolute corners of the image - this is huge boon for an astrophotographer, and is an obvious lens to acquire for this genre if one is serious about their craft). I therefore, cannot at all mourn that many modern lenses are very corrected and very sharp etc because I directly benefit from them; this is not what this article is about. But do we really want this for all aspects of our photography, especially for genres such as portraiture? Because I see this look creeping into these lenses now, even if many manufacturers tell us they have been designed with an artistic vision also. I don’t think I’ve ever heard a bride ask for more megapixels on her face. No bride has ever asked for more resolution to see the layers of makeup that have been applied, or any facial wrinkles that she did not manage to hide beneath it. No, most of the time we are wanting the opposite, at least in my opinion. The ‘glowly’ look beats this ultra sharp, ultra digital look to me every time. It just so happens that lenses designed for film interact with digital sensors in such a way we get some quite interesting properties from them. Aside from all this optical engineering perfection we have seen, in my opinion, we both gained and lost something at the same time. But even then, some lenses are oddities and seem to do both well - the Tamron for one, another great example seems to be the 135 f/1.8 Plena for Nikon, which does astrophotography supremely well, and has the right qualities for portraiture.

For me, it is really boring to shoot with lenses that have no character when I am shooting portraits / things / stuff. Some people just want clinical, sterile: an exact reproduction of what was there. However, in fixing all these flaws, improving the distortion, taking out all the aberrations, the scene has changed, and for some genres, not for the better, infact it can just waste even more time at the post processing stage trying to blur all this detail away, and we cannot replicate the little flaws in our old lenses in post easily either. How lucky we are to still be able to use all this old glass for the pictures we wish to create. In a lot of ways, we have never lived in a time with more choice.

Voigtlander Aspherical VM 40mm f1.2 (Courtesy of Vlad Andrus, Romainia)

Some Tips

Try not to use these photography depth cues in isolation. Instead stack them on top of the compositional depth cues like converging lines, etc. There's a good reason why shooting a model on train tracks has become a cliché...the converging lines add depth.

Generally I recommend shooting 3D Pop with the largest sensor format and fastest lenses that you have available to you. This is mainly to have more DOF control at good subject distances. Personally I rely on fast primes in the 24-200mm range. The lens should have a slow focal plane drop off at the transition, which modest focal lengths and faster lenses do better for the most part.

You also want to consider lenses that have a rougher bokeh quality to them as rough bokeh mimics what our eyes see naturally. It takes us away from the brain recognising optical effects to something that feels a bit more real. Contrary to conventional wisdom, smooth bokeh actually looks fake to our brains which erodes the 3D Pop illusion.

Lastly, shoot 3D subjects where the eye can follow the blur transition from the sharp foreground to the slightly OOF back. The best 3D lenses and sensors still can't turn a brick wall into 3D Pop. Experiment with your scene geometry to fine tune the depth of field. Different focal lengths require the camera to be nearer or further away from the subject in order to achieve the right amount of depth of field. Also, include the ground in the shot. It serves as the contextual floor of your 3D photo. Ideally leave a good distance to the background behind your subject too:

Twisted in Knots - Canon 5D with EF 35mm f/1.4 Version I shot at f/3.2 (Courtesy of fprime photography)

Which Lenses have 3D Pop?

Here is a list of some lenses that are known to help produce the effect -

Nikon 24mm 1.4G, Nikon 24mm f/2.8D, Nikon 35mm f/2D, Nikon 35mm f/1.4 AIS, Nikon 50mm f/1.4D, Nikon 50mm f/1.8D, Nikon 50mm f/1.2 AIS, 58mm f/1.2 Noct AIS, Nikon 60mm f/2.8D Micro, Nikon 85mm f/1.4D, Nikon 85mm f/1.8D, Nikon 135mm f/2D, Nikon 105 f/2D, Nikon 180 f/2.8D, Voigtlander 40mm f/1.2 Nokton, Voigtlander 35mm f/2 APO Lanthar, Voigtlander 50mm f/2 APO Lanthar, Voigtlander Nokton 58mm f/1.4 SL-II N, Kerlee 35mm f/1.2, Canon 24mm f/1.4, Canon 85mm f/1.2 EF, Zeiss 35mm f/2.8, Zeiss 55mm f/1.8, Zeiss 40mm f/2 Batis, Zeiss 100mm f/2 planar

Tip: Lenses that help trip a 3D effect in the viewer should be able to do so stopped down. Many think that certain lenses loose their pop as soon as they are moved from maximum aperture. This should not be the case in the ideal lens. You can see my gear list for lenses I regularly use, and not just for conveying depth and the like, for other genres of photography too. There are apparently some modern lenses in the Nikon Z system which aid a 3D pop effect - the new Nikon 35mm f/1.4S and 50mm f/1.4S. If anyone us using these and can shoot some demonstrative scenes, please get in touch because I will be interested to see more. Kudos to Nikon for giving people options in this vein. Zeiss are certainly still able to achieve this in some modern designs as are other manufacturers like Voigtlander.

“Obviously there are degrees of separation, some of which may, for whatever reason, be close to extreme. But there is also the perplexing question of why some people appear to disagree on how much separation a given image has / or how 3D it is. That's very odd to me.”

Don’t see it sometimes, or any of the time? That's the observer dependency part of this phenomena. The more concordant depth cues that there are, the more powerful the 3D Pop effect becomes and the more people will agree that the illusion is tripped in them. If a photo has just a few depth cues, expect that it will still trigger the illusion in a few people but not many.

Some might say, ‘Who cares? Why do we need that in our pictures? I just want the picture to be sharp in in focus.’ Well, that’s a personal choice. You have your point. There is character vs perfection, and everything in between. I say perfection; no optical perfection has been reached really (what even is that), but compared to old lenses, relatively speaking it has. Don’t see it, don’t care? Fine, enjoy your life taking pictures however you want to, nobody is going to stop you, let alone me. However, once you see it, you will forever grade it in all the images that you take. I will admit I am no expert in this style of photography, (it doesn’t apply for me, in certain genres however I am enjoying experimenting) however I see 3D pop qualities immediately when it is strong in an image and the illusion easily trips for me. Once you start seeing like this, you will want your subjects to be like this where possible. Just remember that only part of it will be your choice of lens. It will also be your skill in how you use that lens too, adding in as many of the concordant depth effects that you can. You may not agree; and that’s fine. As I always say, life is short and you should simply shoot with what makes you happy. I use a mixture of ultra modern and vintage lenses with an enormous sense of satisfaction regularly.

(Continued Below:)

Cafe - Voigtlander NOKTON 50mm F1.2 Aspherical (Courtesy of Werner Wurst)

Serene - Nikon D700 with Voigtlander Nokton 58mm f/1.4 SL-II N @ f/2.2 (Courtesy of fprime photography)

Doggie Paddle - Nikon D810 with 35mm f/2D nikkor

One Way Out - Nikon D700 with Nikkor 50mm f/1.2 AI-S @ f/2 (Courtesy of fprime photography)


Reasons I Use Certain Lenses For Specific Projects

Travelling Small and Light

Sometimes I just want to travel ultra light and not take large and obtrusive lenses along for the ride. This means I am sometimes selecting a lens that is smaller, just for that reason alone. It’s often more than this though; I like the old school look for some of my shooting, that’s just the way I am. I also notice when something improves and other qualities degrade, a subjective matter of course. This leads me to physically use a multitude of different lenses, and to own several lenses which are the same focal length.

Sunstars

As a sunstar connoisseur, I have to drop this one in here. I don’t know which photography community you belong to; perhaps you shoot with multiple camera systems and enjoy the challenge of switching gear. I simply have to state that Nikon in particular have modern lenses which are fairly terrible for this. Just a generalised weak performance over the entire board for the most part, which require too much stopping down to achieve because so many lenses have been designed for bokeh priority now, thus they have lost their straight blades which best created this effect. There are some lenses which approach having a tolerable sunstar, the problem being is it exists at f/22 so I have to blend it into the final shot. Take the Nikon 14-24/2.8S, which can produce a nice enough sunstar, but only when shot at f/22. Now let’s look at some oldies that are better across the range, and produce the effect much quicker, and in a more pleasing way:

Nikon 50mm f/1.8D sunstars at f/5.6 - the pinnacle of how I like a lens to reproduce a scene like this

The 50mm f/1.8D (and 1.4D) produce sublime 14 point sunstars from about f/5.6 onwards. These lenses are bitingly sharp corner to corner from this aperture as well, making them very useable for scenes such as these. I very rarely shoot above f/8 with them.

Nikon 35mm f/2D sunstars

The 35mm f/2D produces excellent sunstars like the old film Nikon 50mm lenses do as shown above. Unlike the 50 design which is simple and easy to craft optically, as we move into wider focal length lenses you are not going to get as much sharpness into the deep corners as you can with a modern lens, even stopped down sometimes. So bear this in mind; the smaller sized wide focal lengthed AF-D prime lenses in particular are a bit of a compromise for size and weight vs ultimate corner optical quality. Realistically though, stopped down they are more than sharp enough. For me, overall look trumps something such as this, for most applications bar astro; if I need to travel light and have access to these traits I’ll simply grab the lens. This looks great as a large print for a company based in Greenock, Scotland who wanted a dusk scene of Greenock - Gourock at night on the west coast of Scotland.

The Film Look

Oh yes, we can achieve this easily. If shooting Nikon, grab a 24/35/50/85 combo of all primes (I highly recommend the 85mm f/1.4D or the smaller 1.8D) and you have it, out of the box. I love this, I use this and never tire of it. The way a lens renders a scene is huge to many. It’s why sometimes we don’t want an optically perfect specimen. We want the one with some glow, some warts, some imperfections that draw on the image. The colour tones that old lenses produce can also be very interesting.

Nikon D810 with 35mm f/2D

Flare and Halation

Lens flare can show up in many ways in an image. Mostly it has been controlled via modern optical design, sometimes astoundingly so! However there are times when I want flare, and the flare of old lenses has a unique characteristic. I know my lenses well in this regard, having shot them in all lights over the years. I just grab what I need and go. Halation occurs when bright points of light bleed outwardly causing a glow effect. I love this subtle, yet beautiful effect found in many old prime lenses.

Spherical Aberration and Dialed Back Lens Sharpness Wide Open

Wide open, many older designs have quite crazy glow when shot at or close to their maximum aperture. Try the 50mm f/1.4D and you’ll see what I mean. I have long since loved this particular lens, I have access to a dual personality with it too. Lens sharpness varies across the prime lenses I own, so it becomes a case of ‘what am I shooting today’ and ‘what focal length and style of lens rendering will I want for that’. All the lenses I own are sharp enough for portraits. When I talk about dialed back sharpness, I am speaking about lenses which aren’t ultra sharp compared to modern lenses from maximum aperture, and do not have enough lens elements to come close to achieving this.

50mm f/1.4D and Nikon D810

Lenses that are more ‘Artistic’ than ‘Scientific’

Obviously your mileage is going to vary here. It really depends on what you are shooting at the end of the day. I really wish I could simplify my kit and not have so many lenses for specific things. In an odd way I wish I could be happy with the clinical rendering of my ultra sharp lenses that I do own for everything. Let me restate my main talking point here…I believe some lenses, with certain characteristics help trip the 3D illusion in the viewer easier than plain, sharp, clinical glass. I do not attribute this to lens element counts, voodoo, magic; however I do attribute the 3D nature of an image to the optical properties of the lens, the subject, the light, the scene geometry…you get the idea by now, maybe…however I do feel that many lenses around today have been designed to achieve good scores in lens tests and on charts.

I am thankful I have access to be able to use a great mixture of lenses, for whatever look I am going for. You should employ the same thought to what you shoot. Use what you enjoy using, and what works for you for the results you want to achieve. I never advise people to merely copy me. A shooter should discover their passion and develop their own voice and style over many years, employing the right tools to seek that vision.

If you have a photograph that you think is a strong example of 3D pop please get in touch and if good, I’ll consider adding it to this article.

If you enjoyed this article, consider following me on Instagram or Facebook.


Aurora Lights Up New Year Skies Over Scotland

Introduction

New year was brought in with quite the introduction; as extremely strong aurora held out until early evening until darkness came. I managed to get to a few locations to work some compositions as I missed the strongest part of the show which happened around 5:30PM GMT. To see more, visit my facebook or instagram. If you want to learn how I do this, visit my aurora shooting guide here, or leave a comment if you have any questions.

Aurora Road - Nikon D810, Sigma 14/1.8 Art.

This was a bit of an impromtu outing; we were about to have dinner but decided to postpone as an aurora alert was picked up by the Glendale App. Missing the first major part of the display, we arrived at around 5:50pm and my son took this first picture with a little help from myself. (He already is good with the settings; I helped just line up the road properly in the foreground with the heavy 14mm Sigma prime - we had to act fast as the aurora was slowy fading and had to watch for cars of course). Never turn your nose up at a quick roat shot, if done correctly it can be quite impactful, and it at least means you secure at least one useable picture from the night! Just remember to work the composition. NB: On a PC, click any photograph to see them large. On mobile, simply pinch zoom into them for a more magnified view.

The Big Dipper and the Boats - Nikon D810 and Sigma 14mm f/1.8 Art

Compositions were really difficult here. The reservoir was very high this evening, and the shoreline access restricted. There was a lot of clutter and boats sunken, and sitting stuck together. This at least allowed for them to remain stationary. I pulled out as much clutter as I could in these shots, acutely aware of the fading aurora light.

The Plough over Glendevon - Nikon Z8 with 24-70/2.8S

Sunken Boat and Aurora - Nikon D810 and Sigma 14mm f/1.8 Art

I quite liked the simplicity of this picture, and just the glow from the sky reflecting off the water. I framed up with the plough (or big dipper) and the Draco constellation (or the Dragon - the head of which you can see upper left shining brightly).

The Frandy Tree - Nikon Z8 with 14-24/2.8

Lastly a quick jaunt to a tree I have photographed far too much, however just could not resist because there was no wind and still some aurora in the sky. I doubt I will top my previous efforts, as the lights were so strong. Still however, a worthwhile picture. Looking South, we could see a SAR (A Sub Aurora Red arc) across the sky, as shown in the above image. Conditions were perfect to photograph the tree. We want, aurora, no moon, and no wind (yeah and obviously clear skies). It is very important that there is no wind for tree shots such as this, otherwise the edge branches blur out. The next shot is looking north, the direction that aurora is usually photographed from:

Frandy Tree and the Milky Way - Nikon Z8 with 14-24/2.8S

Closing Thoughts

Remember that aperture is vital to achieving great aurora images, especially when it is faint. You want nothing slower than f/2.8, and ideally faster, especially for shorter focal length lenses. If you miss the strongest parts of the show like I did, do not be disheartened; even weak aurora in the sky with a more thought-out composition, always beats a poorly composed snapshot showing rays in the sky with a black foreground. Keep your pictures looking like night time, and always think quality over quantity.

Keep watching the skies!

Steve

Nikon Users Demand FTZ Adapter Which Autofocuses Screw-Drive Lenses

Introduction

Nikon’s FTZII

The First Version FTZ with tripod foot that got in the way of the Z9 body when shooting

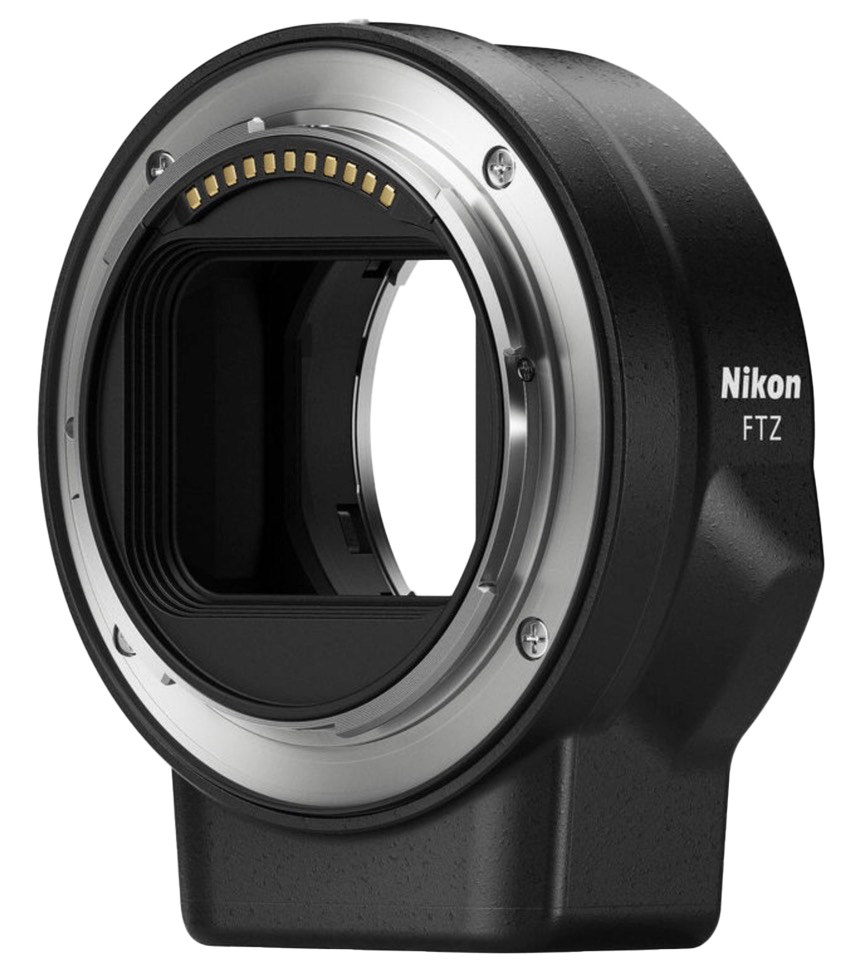
Nikon has so far made two variations of their FTZ adapter in order to be able to use ‘F’ mount lenses on their ‘Z’ mount mirrorless system. The first version had an ugly tripod foot which embarrassingly got in the way with the Z9 body when they eventually released the camera; it was not very well thought out. The second, improved this design, shaving off the foot completely and giving the adapter a closer to round appearance. (Note, it is not perfectly round, there is a lump on it’s side to house the aperture motor for AF-S lenses. This is annoying because collars etc cannot be added to mount heavy lenses, and they could have simply made a rotatable, removable foot. It seems like these things were rushed products, with the B team working on them). The aperture motor works with AF-S, AF-I, AF-D, and AF lenses, as well as manual focus lenses with an ID chip like Nikon AI-P, Voigtlander SL, and the Zeiss ZF.2, Milvus, and Otus lines. It even works with AI-S lenses if someone adds a "dandelion" chip to the lens. Despite these two previous adapters, many Nikon diehards are still waiting on an FTZIII which would autofocus all lenses Nikon has made since the 1980s which have screw-driven autofocus. Most of these are AF-D lenses (the terminology was such that these autofocused (AF), and provided distance information (D) to the camera so that automatic flash exposure could be properly calculated). These types of lenses came on the scene in early 1980, and generally speaking most are better built than the AF-S G lenses in my opinion. (Remember, there are AF-S D lenses from the later end of their production). Screw driven autofocus lenses are lenses which do not have a focus motor within the body of the lens, and rely on the motor residing in the DSLR camera to physically connect into the lens and move the focusing block within it. AF-S, AF-I, and AF-P lenses all have focus motors intrinsic to the lens.

I assume Nikon considered the potential reduced revenue from sales of Z mount lenses and decided not to develop a proper, all bells and whistles adapter for the market. I think this has been a rather foolish and short sighted strategy from a company that, around the time of the D850, made presentation after presentation about their heritage and how they believed new technologies could combine with old to provide great cameras, and technological solutions. I believe they lost a lot of people who were then free to explore Sony or Canon mirrorless systems, as they’d have to buy a lot of new lenses that they where using on the DSLR bodies anyway if they wanted their full functionality. People are still talking about this years later, and the fact they have not done this so far has only hurt their reputation. Nikon have truly failed to understand the sort of added value something as simple as this could give their brand. It’s not always about making huge volumes of money on each product (although I do think if this was done correctly they could easily make a profit off it. Just simply sell it as the new adapter that does everything and bin the other two - consolidate them.). For me, it’s about creating an unmatched brand value and system that is unrivaled in it’s backwards compatibility. Nikon should not underestimate brand cohesiveness and the message that sends to the loyal fanbase who have been using their camera’s and lenses for decades.

The Rumours Have Started

A new rumour has surfaced via China that Nikon has a working FTZ adapter tested previously, yet never released. Apparently Nikon are gearing up to release this adapter in 2025. This has been further reported by the reputable NikonRumors website, with them stating the obvious about the facts of the matter so far. The chatter on this problem has never stopped from day one. On release of the Z mount system of cameras and lenses there was a large resounding ‘Boooo’ from many Nikon die hards who were not interested in buying new lenses when they already had collection they were happy using already. This noise has remained, and the initial disquiet was similar to the single card slot thing that made Nikon bring out version II of their Z6/Z7 cameras. They have done the same thing with these adapters; and to me it seems they are slow at learning these things, or the bean counters should be tied up in a dark room and left to mull over their bad decisions for a few weeks with only bread and water.

There is also a second rumour, via a contact that I have through another. They are apparently, usually quite reliable. The scoop is that there is an adapter which is fully tested and ready to go. We don’t know much more than this, and the reality is that Nikon like any large company could decide to pull this at any minute. If this is all true, I really, really hope they don’t do this, and I think it is unlikely that they would do so if they had come this far with the project already. So, this could be quite an exciting year for Nikon in 2025. The added value they would bring to their F and Z mount systems stretching back decades would be simply immeasurable.

Nikon have a history of deep legacy support and a long, rich heritage…and they never stop telling us about it whenever they get the chance. It boggles my mind that they don’t just flesh one out (I’ll bet, as mentioned that they have a prototype of this already) and add huge value to their system and get some excellent far reaching publicity on the internet while at it. (While you are at it Nikon - you need to address the firmware inconsistency across your lineup of Z mount cameras. Most don’t even have 5:4 crop mode in them, and some are missing functions other cheaper cameras have - edit: this needs to be another article I think).

Some Thoughts

This is certainly not a difficult engineering problem for any competent engineer, less the team of designers at Nikon. I think this has been more about the bean-counters than anything else. There is no doubt in my mind that the type of adapter sought is absolutely viable. There are some areas of consideration:

  • The proposed adapter has been postulated to draw more power - however I don’t see any reason why. Realistically, the onboard autofocus motors in the Z lenses (or AF-S lenses via the FTZII) draw a power from the battery. It would matter little where that power was used; either in a lens based motor, or an adapter based motor. The current FTZII is already communicating power from the camera battery via it and into the lens. Nothing really changes here.

  • The adapter would need to be engineered to understand the protocols coming out of the AF-D lenses and be able to accurately do their autofocus ‘stuff’.

  • Retaining weather sealing would be nice as per the current designs, this could simply be considered and brought over to the new adapter.

  • Ignore what posters on prominent photography forums say about this for the most part. They are obsessed with ‘new is better’. They are blinded by it. Forums are full of gear heads that couldn’t shoot a competent picture if they tried. It’s the ‘all the gear no idea’ thing going on with most of these fora, for the most part at least. I’ve noticed that our profession is littered with people that think a new camera or lens will solve a problem; or make them better. The marketing is all geared to play to this internal self doubt they have. You aren’t a man if you don’t shoot the latest 45MP camera! There even seems to be this misplaced animosity toward people still wanting to use some old glass, or use older lenses for specialist shooting purposes as I do. Such is the strangeness of these types of places which are full of negativity and over moderation, such that rational thought cannot properly win-out. Why does it bother these people so much if they would not actually use the proposed adapter if produced? Looking at the evidence I am seeing; it seems to get them easily bent out of shape. Amusing? Yes. Sad? Yes.

  • I think Nikon should have brought out the adapter expected of them from day one. Nikon’s initial adapter and even it’s second, are by far the worse out of the three big players. They simply have been outclassed here and they should be embarrassed about this. I am acutely aware that Nikon have stopped physically producing most of the lenses that this adapter would / could be used for, however that never stopped Sony from doing something very similar, and absolutely does not displace the added brand value it would bring along to the Nikon ecosystem. They also aren’t making any new AF-S, G, P, or I lenses either, yet it still works for those.

  • Consider that if the adapter made zero profits for Nikon, it really could be thought of a ‘Halo’ product. Ford lost money on the Mustang for three decades. However, they knew by having it in movies, in showrooms etc that it would sell other products. It was cool to buy and own a Ford car. There are many examples of this in industry. Nikon need to think about this on a deeper level, especially when they are so used to harping on about brand heritage and backwards compatibility! I still argue they have done this back to front, however they have now fleshed out most of the Z mount. Now, finally is the time to do right and stand by your own company ethos.

  • What is even more ridiculous on Nikon’s part on this whole manual focus farce on mirrorless with the AF-D lenses, is that the Zf body Nikon released a good while ago now came out with a very useful function known as ‘manual focus eye detection’. This allowed a shooter using manual focus glass (or AF-D glass which has been crippled on the FTZII by Nikon) to detect the eye, thus on a button push we get a magnified view and can focus the lens easily. This is a huge boon, and makes manual focus much more efficient. Has Nikon bothered to put this into their flagship bodies all this time since the Zf release? No, they haven’t…

Sony LA-EA5

And guess what. Sony have already done this more than four years ago. Sony used to have DSLRs before they became market leaders in the mirrorless world. Their DSLR, ‘A’ mount, lenses, can be mounted to their ‘E’ mount mirrorless cameras with this adapter. It has support for A mount lenses similar to Nikon’s, which do not have the autofocus motor onboard the lens. They even let advanced functions like eye autofocus be used on certain cameras, and support up to 11 FPS! It’s also noted that Sony’s version works screw driven lenses about as fast as their DSLRs do. The facts are simple: Nikon are just way behind Sony in this metric, they have been simply out classed. Despite having both aperture and focus motors, Sony’s is the same price as Nikon's adapter with just an aperture motor. It's also perfectly cylindrical, instead of having a bump for the aperture motor like Nikon. It is a vastly superior design on many counts. This is Sony’s third adapter. The LA-EA3 didn’t support screw drive autofocus. The LA-EA4 did, but had pretty poor autofocus. Another adapter from Nikon now, would be their third…

Nikon Greatly Overexaggerate

Have a look at this, from here: https://backcountrygallery.com/exclusive-nikkor-90th-anniversary-interview/

"- Is there a technical limitation that prevents a focus motor in an FTZ adapter, and if not, would you consider adding that to a future version to drive older F-mount autofocus lenses?
(Ishigami)

In order to provide such support, we would need to design an FTZ with a built-in motor, which would, for the sole purpose of AF-D compatibility, require a considerable increase in the size and mass of the adapter. To be completely honest, this is not our highest priority.

We are devoting our development resources on expanding the Z mount system and maximizing its benefits. This is not to say that system compatibility is not important—of course, I know that there is demand from the market, I would appreciate it if you could understand our reasoning."

This is just complete codswallop. Let’s examine this a little closer. There is simply no reason that the adapter would require to be "considerably" larger. Sony's adapter already weighs less than Nikon's does - The LE-LA5 weighs 88g vs the FTZ-II at 135g, so Sony figured out how to make an adapter with a focus motor that is lighter and is smaller than an FTZ-II without a focus motor. The Sony is also a polished and refined design: it's nicely round with no protrusion for the aperture motor like the FTZ has, and it's lighter. Nikon have absolutely been outclassed here in this respect with these FTZ's, there are no two ways about it...

Regarding their statement that it is not their priority; that is their prerogative. Despite this, the demand for one still exists, and by not meeting it, just makes them look bad.

Items that could be in a FTZIII

  • Autofocus support for all G and D type screw-drive lenses (again, this is mainly AF-D lenses)

  • Full AI lens support. Nikon AI lenses are manual focus and decades old, however Nikon went real lazy here. They only meter in two modes, and they don’t even record the shooting aperture on the FTZI or II in the EXIF. That’s not really difficult to do Nikon, come on…

  • Removeable tripod foot. I stated the foot either on the FTZI which was later removed in the II. It might be nice to have the option, as per the Sony LA-EA5 adapter

  • Rotating Tripod Collar. Really useful for vertical shots when using an adapter

Some Favourite Classic Lenses

Top of the list is the 85mm f/1.4D which I’ve previously written about here. Then there is the 135mm f/2D. Then let’s consider this other fairly large list, there are many more than this though:

  • 20/2.8D

  • 24/2.8D

  • 28/2.8D

  • 28-70/2.8D

  • 28-105/3.5-4.5D

  • 35/2D

  • 35-105/D

  • 50/1.4D

  • 50/1.8D

  • 60/2.8D macro

  • 70-180/D macro

  • 85/1.8D

  • 85/1.4D

  • 105/f2.5 AI

  • 105/2.5 AIS

  • 105/2D

  • 135/2D

  • 180/2.8D

  • 200/4 macro

  • 300/4D

It’s not a short list, and this doesn’t even nearly list all of them that could be brought into full compatibility with Z mount. Why you ask? Is a picture needed? Ok, let’s go modern classic:

Portrait of a Baby Boy. Nikon D700, 85/1.4D. Imagine how cool it would be to use a classic like this on a Z camera with full autofocus, and maybe even eye AF like Sony has done. NB: tell me why this needs to be sharper?

Nikon AF-D Have Many Advantages for my Shooting Style

Some of my favourite old lenses are the AF-D primes. I have my reasons. I love the compactness, the look they produce, and I have some specialist applications for some of them. Take the 35/2D and 50/1.8D. These are spectacularly good lenses for shooting urban night scenes. They produce remarkably unique and defined diffraction spikes (sunstars). The newer 20mm 1.8G for F mount is also very good in this regard. Sunstars in particular seem to be something that Nikon has forgotten about, or at least not prioritised them in most of it’s native Z lenses. There is still a case for the old gear for this alone. A good sunstar can make or break a scene if done right. I have other uses too. Some of the older lenses like the 20/2.8D and the 24/2.8D (both film designed lenses) produce noticeable halation over points of light. Essentially, this one exists from the film days. As light passed through the light sensitive layers of film, it reflected back sometimes and flared over light sources. It produces a glow by doing so, and it’s something I sometimes use in my shooting for creative effect (it’s a difficult one to do in post processing).

Another consideration is if I want to go light, and use a lens that is dependable, and doesn’t have an autofocus motor in the lens to fail at a critical moment and leave me left with a manual focus paperweight during the shoot. Then there’s their are simple lenses such as the 50mm 1.8D, which I use a lot when I want to shoot a scene with perfectly straight lines, because it has the least distortion of any lens in the Nikon system that I know of - even the fancy pants Z mount system 50’s have more distortion in them. You’d be surprized how this can affect faces and it isn’t always correctable. (It lets me get up close to a subject and not cause distortion also). I also grab it for it’s crazy flaring - part of the look and feel the lens imparts on the image - I use it for that too. Then there is the fact it’s softness and spherical aberrations present when shot wide open help to tame skin that’s less than perfect without any post processing required for skin specifically. Another win. We’ve been chasing this sharp wide open lens thing for years and there are applications that it matters for to me, such as the astro component of my shooting. But portraits? No sir! Then there are the classics I have already mentioned, the 85mm f/1.4D and 135 f/2 DC lenses (the latter of which Nikon has no real substitute for in Z land). The former 85mm, is still living on my D810 today and I bring the D810 everywhere because of this (I also love it’s sensor). The 85/1.4D is already as sharp as I need it to be, and has better bokeh and focal plane transitions than the newer G did, which was also a lot slower to focus. Nikon still doesn’t have a long macro lens, again that mantle is still held by the 200/4D which would be a delight to use on the FTZIII with autofocus.

The biggest mistake I see so many making is their one mindedness that their way is the only way. They don’t consider what people shoot, or their goals or objectives. They can’t see past that ‘some new lens is sharper’ and that ‘why would you buy a new mirrorless body to shoot old lenses on’. It’s always gotta be this black and white thing and I personally tire of reading it from loud mouth forum users. Take one genre, the wedding market. I’ve shot that with AF-D primes for years and I do so broadly speaking due to the look they give me. I want to desharpen some lenses, not sharpen. This is where we go so astray for me in digital land. This sharpening thing is crazy when it comes to essentially portraiture in particular. No one wants to look sharp and digital. They want soft and dreamy, nearly every time. Especially the general public. Most work I see online now has that horrid digital feeling, when I want to lean toward something more analogue. If this is your audience, don’t worry about wasting over two grand on Plena lenses. The old stuff looks great as it is, and can be found for a song second hand. Photographers’ have absolutely been sold a bill of goods for the most part. There is absolutely nothing wrong with any top level Nikon F or canon EF lenses to shoot weddings with, or portraits, or many other genres. There are some genres that mirrorless aids with (astro, landscape) but for the most part, the reality in my mind is that mirrorless exists to give manufactures a reason to sell all the same stuff to us again. Think about the video media industry (which I used to actually work in, many years ago), it’s now completely defunct: we had VHS - DVD - Bluray. You just bought the same film you love, three times over, or more. Was it really worth it though? I already plan to write an article on the older screw drive lenses in Nikon’s back catalogue that I still use today - stay tuned.

Another little realised aspect of owning these types of screw driven lenses, is that they are actually more resilient than new lenses with motors. Think about it. There is no AF motor to burn out in these lenses. They are more resilient because of this. Think about when my 24/1.4G motor burns out and Nikon won’t repair it. I’ll have to buy a whole new lens, second hand probably! There are so many different lenses out there, thousands upon thousands and eventually DSLRs might one day stop functioning. It would be nice to see them survive onward. I also see Nikon stopping making the D850 and D780 soon. This means that the adapter is more viable again in a way, because Nikon will not be producing DSLRs anymore at some point in the future. They can go right ahead and bridge that gap by simply making a III FTZ that fixes all this and also sorts out compatibility issues with AIS lenses and more.

Final Thought

Let us hope that Nikon wake up and sort out some seriously low hanging fruit that can be tended to in their Z system in a general sense. There are many things that need addressing which are relatively simple to implement. Regarding the FTZIII, I am still holding out for this happening because I see no reason to change lenses I am perfectly happy shooting with for specific applications. I will say, I still love using them on my D810 body with no crippling of functions, however options across mounts are always useful to a shooter. Before you sit there and tell me the old ‘Nikon knows best’ thing I’ve read online a thousand times, remember that Nikon has also gotten a lot wrong over the years too. I personally think they should sit up and take notice of the calls for the FTZIII which does what it’s fanbase ask of it. Do you remember like me, Nikon stating in interviews that they ‘listen to their customers’. Now they have a chance to prove that true since the message is loud and clear, rather than paying the loyal fanbase mere lip-service. I think we could be on the cusp of the former occurring.

NB: This article was consulted with Photographer and Engineer Joseph S Wiśniewski from the USA for the technical side. I thank him for his valuable input and great experience in this area.

Update - Monster have now released an adapter, the ‘MonsterAdapter LA-FZ1’ capable of autofocusing all the old AF-D Nikkors. Read more here. There are currently limitations that it will not autofocus lenses with AF-S motors, or support VR however that will likely come in time with a firmware update. Kudos to Monster, shame on Nikon!

If you enjoyed this article, consider following me on Instagram or Facebook.

Steve

Settings and Techniques for Shooting in Available Light with Fast Prime Lenses

Street Gaming. D810 with 50mm f/1.4G fast aperture prime lens. Settings: 1/60, ISO 3200, f/1.4.

Introduction

I have an affinity with night and low light photography going back at least a decade and longer. In this article I want to discuss capturing portraits in low light - either candid or more posed type images and then we can briefly contrast that with how to approach posed setups with a view to professionally light a subject with speedlights or strobes. The rules are the same for both. If we have a flash we can create light anywhere. There are some basic techniques to get the best fidelity out of a flash and I will discuss that here. If we don’t have a flash, we can look for the best light in a scene and either position our subject in that area, or wait until they physically occupy that space. The forerunning picture in this article is of my son who, of one evening got out of the car still playing his Nintendo Switch console. It is shot entirely in available light. I started to unpack the car and as I turned round, he perched himself onto the wall as we see here. Never being one to miss a beautiful moment, I grabbed my D810 which I had in the car (I nearly always have a camera with me wherever a go). I had my 50mm f/1.4G attached. All I did was line up the background and subject, position myself at the correct height (very important) and the rest is history as they say. He is holding a package that his transformer toy came in, that from memory he opened in the car. I could have motioned him to move that or take it away from him; but then it wouldn’t have been a real moment. I would have interfered with something that looks great without my spin on it. It’s much the same way I shoot weddings. I see so many photographers directing the bride and groom, like they are on some Hollywood film set. Their day becomes about parading about doing the same old cliche shots, and ends up being a vision the photographer had of the day, rather than what actually naturally occured. In my mind, true reportage / candid photography should be respected and left as such, and it’s an ethos I hold dearly in my shooting technique.

Girl in Field - Nikon D800 with 135 f/2DC Prime Lens. Fast Primes produce a very unique look, whether it be low light or outdoor daylight shooting.

Shot Discipline

Shot Discipline is absolutely crucial to understand in order to master this craft and type of shooting. Shot discipline is about ensuring our settings make logical sense, and thus are gathering the most light, the best colour, the lowest noise and the highest quality overall rendering of our subject and scene in the process. Before you go any further, it is best you understand this on a deeper level. Read the full article on this here. Consider and remember that shooting in available light does not necessarily just mean low light, however. It just sets the boundary that no additional light is used. For available light shooting outdoors, it becomes a simple venture of mostly base ISO work and the shutter speed that will stop motion. This is quite easy to setup, and this shared article will help you attain these rules.

But ‘High ISO’ is so good now

It really grinds my gears when I read this on photography forums. Do not ever take advice from people telling you that aperture doesn’t matter anymore because ‘high iso’ is so good now. They are speaking about higher iso’s being cleaner and more usable than over a decade ago. That is true, however it doesn’t change the fact that shot discipline and the right lenses will give noticeably better results. It doesn’t change that photography is light, and aperture is one of the corner stones of getting good quantities of light to the sensor. Don’t hamper yourself in low light by shooting with f/4 lenses. Don’t stop down f/1.4 prime lenses to f/5.6 in low light to get depth of field at the penalty of huge amounts of noise unless you are using flash or strobes. Use composition, light, subject and timing to make your photograph stand out. For my thoughts on noise, read my article on that here.

Equipment

Ideally we want a full frame camera such as the Nikon D810 (highly recommended). And a fast aperture prime lens, a 50mm f/1,4 is a good start. We want a full frame camera, because they collect more light as they have big sensors, and this brings greater noise performance along with the rest of it. We want a short to medium focal length (28-85mm) with a fast aperture. We don’t want a really long focal length, at least not yet. Hand holdable shutter speeds are easier with short lenses, more on this concept later. Equipment I recommend for these tasks…

  • 24mm f/1.4G / 24mm f/1.8G

  • 50mm f/1.4G / 50mm f/1.4D / 50mm f/1.8D / 50mm f/1.8G

  • 85mnm f/1.4D / 85mm f/1.8D / 85mm f/1.8G / 85mm f/1.4G

Any 35/1.4 is also a good choice.

Available Light

Shooting with available light is the first thing most people do when they obtain a fast aperture prime lens; and who could blame them? However, to get really good at this and for the pictures to make logical sense, we need to consider light a lot more than the average person does. Quantity, Quality, Direction. These three things are paramount. Sometimes we won’t be able to have all three, in fact, often we won’t. We might only have two, and a great subject. With the right timing, and a little bit of composition know-how we have ourselves a great picture. Read more about timing and composition in my previous article here.

Wedding Girl. Nion D700 with 24mm f/2.8D prime lens

Light Quality and Quantity / Direction

A very important topic is the quality, amount and direction of our light on our subject. Hard light sources tend to produce more focused beams of light, and hard shadows with fall off. Hard light sources generally come from smaller light sources, at distance to the subject and are usually less diffused (hence the name). Soft light, is generally generated by light that is diffused through a diffuser such as a fabric, a cloth, curtain, blind, umbrella (in posed shooting), a softbox (again posed shooting) etc. Some of the softest light we can get is the natural softbox effect of the middle of the day overcast cloud. Light becomes extremely soft and even, because the light from the sun is passing through an interface (cloud) before it strikes the Earth’s surface. Another easy given is window light, even better if have a thin blind / diffuser that can be placed over it for more control. Pop a subject there on an overcast day and try some compositions. Try them front lit, and fill their face and eyes with soft, even light. Then try them side lit. Get some shadows on one side of their face. Don’t be too rigid whilst learning. You don’t need to know the names of the light styles you are shooting, like Rembrandt. You just have to do what looks good at this stage. I highly recommend studying old paintings. ‘The Blue Boy’ for one. Look at the 18th Century Gainsborough paintings. Check out the feeling created in Constable’s paintings. Look at the world he creates from a picture. Watch the Stanley Kubrick film ‘Barry Lyndon’ for more inspiration. Look at the famous Renaissance Portraits. For me, I have always been fascinated by iconic paintings. Choose your inspiration, because everyone has a place that made them grow from.

Little Girl at Wedding. D800, 85mm f/1.4D Prime lens - Shot with window light on an overcast day

Quantity of light is something that available light shooters can do little with. We have to work with what we have at the scene. There are some ways however. Due to the inverse square law, light falls of extremely fast from a light source. So if you are shooting a subject by window light, or even candle light, move them closer to the light to gain more intensity. This also increases quality too, as the lightsource becomes effectively larger relative to the subject. When a light source get’s larger in this way, it always gets softer and we get better quality light on our subject as a result. Test this. Get your phone out and go into the bathroom with the torch on but the lights out. Put the torch on your face, ultra close to the side of your eye / cheek/ Notice how soft and beautiful the light appears? Now move it away, as far as possible from your face, at arms length. Notice how nasty the light just became? It’s because it got effectively a lot smaller relative to your face. The light went from a soft light source, to a hard light source. This is why, when we see people shoot professional scenes, they use huge softboxes and umbrellas, and they are super close to the subject’s face being photographed, often just off camera and out of shot.

Direction of light is something that we can also control near windows to a degree. For example, by very simply pulling curtains together a little, we can leave them open in areas that create soft yet directional light. Outdoors we can have some control of the direction of light by observing the angle of the sun relative to our subject. We can position them, and shoot at a time of day that produces better light. We can also, mix available light with some flash if feeling adventurous. Trial placing the sun behind a subject to start. The try from the side, then from the front. At this point, form opinions about what looks best, and what works for your shooting style. Indoors, in lowered available light, the obvious direction of light comes from the arteficial lights themselves. The lamps, ceiling lights, and other light sources that interact with our subject. We need to look at these and wait / position our subject near to them in an optimal way to achieve an interesting picture.

Portrait of a Boy. Nikon D700, 85mm f/1.4D Prime lens - Using window light as a rim light to create light and shadow

Settings

So how do we approach settings in available light, in particular low? Well, this comes from learning about the camera’s inbuilt light meter. All camera light meters measure the reflected light from a scene into our lens at in instant in time. This allows the photographer, (or in auto mode, the camera) to make a correct exposure of the scene. However, how do we actually do that? What are the actual mechanics at play? Let’s look at an example first.

Arcade Boy - Nikon D810 with 24mm f/1.4G lens

I watched my son for quite some time delicately placing his 10p coins into the slots in this arcade machine. I have the benefit that with Nikon cameras and their top screens, I can see what the meter is reading at all times. (tip: menu, and extend the meter off delay - this will allow you to decide exposure before you even bring the camera to your eye). With the D810 and my 24mm lens in lower light, I will often be in manual mode for pictures such as these. I will also be at the widest aperture to gather the most light. I will also be here to get the best separation as you can see here in the final shot. Next, I will be considering my shutter speed based on the movement at the scene and how sure I am of my abilities. I know that I can hand hold a 24mm lens down to 1/15 and get pixel level sharpness. However, there is no way that my son was that motionless. Therefore, I went up to 1/80 and waited until he was positioned correctly in the frame, and paused any erratic motion as to take the picture. The camera meter will have a central point on the display in camera of where it thinks is ideal exposure. This is where I look to the ISO to correctly expose the scene. We have so far, an aperture of f/1.4, and a shutter speed of 1/80. This defines how much light we collect. ISO is a digital signal boost which brightens the scene to that it looks correct to our eyes and makes a good picture. In this particular case, light was so plentiful that base ISO 64 let the meter see ideal exposure with f/1.4, 1/80. In lower light, you will have to boost ISO to achieve a properly exposed image. If you can, opening aperture or lowering the shutter are the two parameters that actually increase the light collection the sensor will see. Remember that ISO is a digital boost within the camera after the fact. However, we do need to use ISO to do this, so that we don’t invoke more noise, or colour casts from bringing up overly dark images at the scene in post processing. If you approach low light scenes like this and the camera lets you see ideal exposure with 1/80-1/100 shutter speed at base ISO, you just won a watch. If the meter tells you that you can have 1/50 shutter speed, but you need to be at ISO 1600, obviously you are in much lower light. You can either add light with flash, get closer, or open up the aperture of the lens wider. If you are at the maximum aperture, you can also drop the shutter, but then you have to contend with scene movement, and the steadiness of your own hands.

The Laughing Bride - Nikon D810, 85mm f/1.4D. Low light quantities, but decent quality and direction allow for a shot in available light.

We need to be careful of illogical settings when shooting in manual mode. Here are some for this scene:

ISO 1600, 1/8000, f/1.4.

These make absolutely zero sense. Why would I shoot at ISO 1600 when I have a shutter speed of 1/8000? Unless we are shooting greyhounds in a dark room moving at vast speed, we do not need such a high shutter speed. If the meter suggests this is a good exposure, then we can simply modify this to logical settings, thus ISO 64, 1/500, f/1.4. We just made our picture have much higher quality because we could use base ISO - where all the best quality exists. Now we can’t always do this. Let’s look at more illogical settings that I see all the time when people shoot in low light:

ISO 6400, 1/100, f/4

These settings make little sense to me. Why are we maxing out our ISO (where noise is going to be a problem, and colour is going to be poorer) when we are at f/4? If we are shooting with an f/2 or even better, and f/1.4 prime lens, we can drop this to something much more logical. We can be at ISO 800 if we have an f/1.4 lens! This would give the following: ISO 800, 1/100, f/1,4.

Remember, light collection is garnered via aperture and shutter speed. ISO is a digital gain applied after the fact, within the camera’s electronics and software. Photography is light. Let your sensor be bathed in it; do not starve it of light with less than optimal settings. However, also, do not get so caught up in settings that you miss a picture. Learn and understand exposure so intuitively that you do not even have to put much thought into it when shooting,..then you will be free to think about composition and timing.

Glow Stick Girl. Nikon D810, 50mm f/1.4G

Next let’s look at an image which is absolutely pushing the limits of available light shooting. ISO 12800, f/1.4 and 1/40 were my settings for this one. I knew that I could hand hold a 50mm lens to less than 1/40, however I had to think about the kid’s motion too, hence I settled on 1/40. Timed right, I’d get a sharp shot, as I have done here. ISO 12800 was easily decided on because the only light was the glow stick in the dark room. So I selected the maximum ISO of the D810. The aperture was another easy decision. We want that wide open in low light for something like this, so I had it set to f/1.4 from the get-go. To touch on what I said earlier; notice how soft the light is on her face here? It’s a tiny light source - the only thing lighting her is the light from this tiny glow stick. However, because it is close to her face, it becomes very soft.

In this sort of light, the meter is always going to tell me that I am badly underexposed. The light meter in my D810 is trying to effectively expose for 18% grey. Thus it sees this sort of scene as underexposed. In these conditions we simply must extract every photon of light that we can from the scene. That’s where full frame cameras like the Nikon D810 come in, with fast aperture prime lenses.

Technique

When we are shooting in lowered light, we want to try to wait until subjects have the least motion, and photograph them at that point. It becomes a watching and waiting game. I do this because, it allows me to use a much slower shutter speed, and get more light onto my camera sensor. There might be the odd time I mis-judge this and I have to delete a picture. So be it. Hand holding technique is another big ticket item in this game. We can practice how to properly hold our camera, how to lock our elbows and arms tight to our body to become like a human tripod. We can even on occasion, use walls to lean ourselves against, or in fact the actual camera itself pushed against a wall for lateral stability. This can allow you to drop your shutter speed even more. Be careful though, you have to content with subject motion. This effect is magnified by the focal length of the lens and your distance to your subject. I can use much slower shutter speeds with a 24mm lens at slight distance, vs an 85mm lens close up. Any motion will be magnified of both the subject and your wobbly hands. Think of it like looking out of your window on a point in the far distance with high magnification binoculars. It’s hard to hold them still and focus in the distance. The wobble is easily noticed by the eyes as we look though the lenses.

A very simple Passport Photo of my son by yours truly

Creating Light

I said I would touch on this topic before I wrapped up this article. It’s the subject so many photographers’ fear. Flash Photography. The subject that makes so many state themselves as ‘available light’ photographers. Do not be afraid of flash. Even if you use available light more than flash photography as I do; understanding how to use flash will allow you to understand light on a much deeper level and it will always elevate your photography.

This is a very simple shot, and bear in mind that it was made as a passport photo, hence my options of lighting are very limited - as are the expressions they want in these things! I can’t create a nice dramatic shadow on the right side of his face as I would like to (I am surprized I got away with this in fact - I decided to push my luck a little and use shallow depth of field too, the guys are the passport office must have just glared over this for a couple of seconds). For this shot I used:

  • D810 on a tripod

  • 85mm f/1.4D prime

  • Light stand with an off camera speedlight through a large white umbrella, camera right, very close to subject

  • Wireless trigger on camera

For nearly all flash photography we use manual mode on camera. We control the shutter speed, ISO and aperture. This means, for example when shooting a wedding in low light, that the background remains consistent, shot to shot. For this type of posed setup I am showing, I still use manual mode. f/2, ISO 64, 1/250 were my camera settings. These settings are easily explained - base ISO for overall quality, f/2 for some shallow depth of field, and 1/250 as that is the flash sync speed. This means that mostly all of the ambient light at the scene will be overruled by my flash going off, creating a nice even light. I set the flash to 1/4 power and in the very low light I was in, I autofocused on the eye using the AF-assist beam in the D810. I noticed it was a little hot on the skin, so I simply dropped back to 1/8 power on the speedlight. And that was it. In posed setups I always manual everything. At a wedding, I still favour mostly available light, however I am not afraid to bring out a flash when the light is diabolical everywhere I look. When in those situations, I switch the flash to TTL mode (through the lens) which means it calculates the power needed on demand. Most of the time it does a fairly good job of it too.

Closing Thoughts

I hope this gives a general overview of how I approach available light shooting. It is always about catching the essence of the subject and using light to make an interesting picture. Sometimes we have more control than we realise. It is about harnessing that ability when shooting in true available light to make the light and the scene work for ourselves. Just remember, you aren’t shooting true reportage photography unless you are observing. As soon as you direct a subject, you are influencing the perception. You can make allowances though. Say you want to grab a perfect birthday candle shot of a loved one blowing out candles in a restaurant. Ask for a seat with a good background separation. Get the subject to sit in a position that allows you direct access to shoot them, and allows a beautiful background fall off because you have given yourself space in the background behind your subject. This will give you a nice depth to work with. There are many examples of things you can do to stack your chances of getting a great picture, without coming across as overbearing to others around us. By thinking this way, you give yourself more opportunities to make better pictures.

If you enjoyed this article, consider following me on Instagram or Facebook.

Steve

D810, 35mm f/1.4 Sigma Art Prime Lens

Nikkor 24mm f/1.4G Prime Lens

Arcade Addiction - Nikon D810 + 24mm f/1.4G Nikkor

Introduction

The Nikon 24mm f/1.4G ED lens was announced in February of 2010. It came out a few years following the release of the D3 and D700; Nikon’s first full frame digital bodies. It was a huge deal to see an ultra fast aperture lens with such a wide focal length. Let me tell you that in 2010, this Nikon 24mm f/1.4 lens was considered the best 24mm full frame lens money could buy, and it was priced accordingly at around £2K! (I paid about half of that in 2015 for a nice new copy). Admittedly a while ago now, however this is a lens that I still use and appreciate to this day across several different disciplines including; portraiture (obviously), landscape and astrophotography. Up until the time of buying this lens I was shooting with a bag of primes (I still do this for portraiture and other photography genres). My then 24mm lens of choice was the 24mm f/2.8D. I know many people dislike it, but they have to judge it for what it is. An old lens design. I still have it in the bag, because it produces a look, and has excellent sunstars and great flaring. It has rough bokeh and the deep corners are not up to modern standards wide open, however centrally it is fantastic straight from f/2.8 and it always gave me a strong 3D impression when shooting with it, in fact I have made some memorable pictures with it in the past and I’ll show one below. That said, I was and am all about aperture, and I just could not resist the lure of this magnificent Nikkor - the 24mm f/1.4G. Click any image on a desktop to see a larger view. On mobile, simply pinch zoom.

Boy in Restaurant - Nikon D800 + 24mm 2.8D

As you can see here, the 24/2.8D is and was plenty sharp centrally, even on a D800 with it’s juicy 36 megapixel sensor. There is simply no reason I would want to see more detail in a portrait on a face. I’ve shot with that lens for many years and knew my way around it in terms of how to get the best out of it. (Hint, focusing at infinity or 1/3 in isn’t necessarily the best advice for landscapes on high resolution sensors). This said, the two extra stops of aperture in the G lens swayed me as I was also becoming heavily into astrophotography. Armed with my D810 at the time, the 24/1.4G was added to my bag and is still in use today.

Cinematic

Personally, I love to capture people and children in a cinematic style. I am a huge cinefile and this influence strongly affects how I shoot weddings also. I’ve always loved using fast aperture lenses because it allows me to most closely match this style. It also gives me the largest advantage in low light, and it gives me options outdoors in bright sunlight to capture pictures in any conditions that look the part and that people will pay for. I learned to shoot using off camera flash to begin with and I am not averse to using it; however I don’t pretend to use it for anything other than very posed studio type work. To capture people that aren’t models in their absolute best light (literally), the most obvious clue of my presence would be a flash going off repeatedly. People act different around a camera and I want to discourage that. I want to blend in. I use aperture to do this. I look for light where possible; for subject, shape and form. If I shoot a wedding, I wait in areas of good light. Then it simply becomes a matter of timing. I do not run about chasing ‘moments,’ nor do I direct them in any sense either, for that style of shooting.

Don’t for a second mistake a lens like this to be about obliterating the backgrounds in photographs. At 24mm, we want context, and gentle separation, and the lens isn’t able to completely dissolve backgrounds unless we are ultra close anyway. Context is so important to a successful picture (depending on the closeness to the subject of course), and the more experienced shooter comes to learn that eventually, once they get over their depth of field obsession (okay some never do). Even considering the background out of focus elements (bokeh), I am placing my subject in a suitable place around the blur. Just look at any cinema. Most of the time there is separation of the subject to the background. This is done by light, the focal plane depth and, the background itself and it’s own contrast. Most of the time in films the director includes the subtle background. Otherwise you simply have subjects’ detached from their surroundings; which rarely tells a good story. The major plus points of this particular lens; are that it keeps contrast a little lower than modern lenses at it’s largest apertures, which better matches the rendering I like from cinema. It still has access to greater contrast, on stopping down, e.g. at apertures such as f/2 and beyond. It is the best of both worlds in this regard. It becomes a dual personality lens in a very real sense.

Imaging Characteristics and Lens Capabilities

First a note on build quality. This lens is really well built. It is mostly very high quality polycarbonate with a metal mount, full sealing and a rubber gasket to seal onto the camera. It’s never skipped a beat in the around ten years I have owned it. I will admit I do baby lenses, so mine still looks as new, however it has been used in adverse conditions consistently - ie by the sea and near beaches. I have had zero problems with it, it still works as the day I bought it. Speaking about the nitty-gritty…The 24mm f/1.4G has fairly controlled spherical aberration for the standard of it’s time, however it is obviously not as well corrected as modern lenses are in that regard. It does produce a bit of glow wide open in certain light, but not much, and I like how it looks. Most of the time, it adds to the subject, and I can simply close the aperture down if I want the effect to dissipate which it does quickly when doing so. The 24 has high level’s of coma and chromatic aberration by modern standards. At the time, this was about the best it got on 35mm format, however things have changed and there are several mirrorless lenses that beat this for astrophotography specifically. The higher coma, is actually advantageous for bokeh qualities, so it certainly pays dividends for portrait work. The lens has a touch of barrel distortion. Not noticeable to the human eye I find unless we put a lot of straight lines into an image right into the top and bottom of the frame. Vignette is quite high, (modern designs don’t improve this though, and are actually worse stopped down than this lens), whereas CA is well controlled. Autofocus is provided by an on board motor, of which mine seems to still work like the day I bought the lens. The lens is sharp at f/1.4, sharp enough for how I like my portraits. I am always after very specific looks with lenses and I dislike the ultra sharp digital look. Take that as the major caveat for where I am coming from when I suggest lenses such as these. I know many share my thoughts. I don’t necessarily put it down to magic, however I use what works for me and you should too. This lens has been invaluable for me for over a decade now because of this. I use it for portraiture, weddings, landscape (landscape less now, as I tend to prefer using the 24-70/2.8S and my Z8). I also use it for astrophotography too. You might wonder why, when I have explained it has quite high levels of coma and astigmatism wide open. Well, this rarely matters much for aurora work, which is done without trackers. With trackers, I just stop the lens down a bit and it cleans up. Ideally I would like a better performance wide open in a 24 for astro and it’s certainly possible; however that would probably affect how it worked for portraiture and the rest of it. In life, we often cannot have everything. I also use the 24 end of a 14-24/2.8S on a Z8 on a tracker if I don’t bring this lens with me. Short story, there are better options for astro only shooting now in 2024 than this lens, however if it’s portraiture, this lens has some undeniable beauty to impart on a scene. The other big thing about this lens is it’s dual personality nature. Wide open some would call it on the softer side, yet stopped down it achieves very good resolution, not quite reaching the absolute best of today however, those lenses can’t do what this lens does between f/1.4-3.5 either.

Here are some genres that I use this lens for:

Landscape

24mm f/1.4 G does Landscape - Check

When I bought this lens, it was pretty close to top of it’s game for landscape. Things have moved on even since, however there becomes a point of diminishing returns. Computer aided optical design has pushed what is possible in recent years, however it doesn’t mean that this lens is obsolete if you seek it’s characteristics and look. Stopped down, this is a perfectly capable lens. Not all lenses are the same at f/8 either; this really is a fallacy because things like CA, especially lateral, do not often improve when stopping down a lens. This lens holds a very solid perfomance from f/4.5-f11, or rather, at ‘landscape’ apertures. It’s rugged build and sealing, also mean with a little care, it just keeps on plugging away as mine has done. (I do recommend wiping any salt spray off as good practice however).

Intimate Details

Lit Leaf - D810 + 24mm f/1.4G Nikkor

At close distances, it is clear as day to see the undeniable attributes this lens can bring to an image. I am very close to this leaf here, and have very little depth of field to play with, even at 24mm. It’s a strange place to be in some ways. The background takes on a soft gaussian blur effect naturally; however it is still very important to compose with the background, rather than against it. Place scene elements so they make compositional sense within the bokeh background. Don’t be hap-hazzardly throwing your aperture about the place now.

Night and Astrophotography

Forth Rail Bridge - 24mm 1.4G Nikkor

For this type of night picture, I am stopped down - to f/16 here to get a nice depth of field and sunstars. The lens like any, will be diffraction affected at this aperture but I wanted to get the sunstar effect, so that took priority here. This lens works well in these conditions - the lens hood offers protection from some of the elements, as does the sealing. Just wipe it down after when near salt spray. For astrophotography, it works, however it has plenty of coma / astigmatism (winged stars) in the corners wide open. It’s just an older design in that regard and you will expect to see this when shooting with it for astrophotography. Unless of course you do a panorama. If using it this way, the edge frames are often cropped off when stitching; this means we see better performance. This shot below is taken at blue hour on the North of Scotland, with some faint Aurora appearing on the horizon.

Astrophotography Panorama with the 24mm f/1.4G

Portraiture

The Arcade Kid - Nikon D810 + 24mm f/1.4G Nikkor

Here is another arcade shot - yeah we like arcades here a lot! Notice the very real difference between this and the 24mm 2.8D picture I showed earlier in this article? The 1.4G produces a very soft, gaussian / painterly bokeh behind a subject at close to medium distances in the frame, which, at these wide apertures it works it’s magic. The 2.8D produces a much more subtle, and rougher background. I’m going to be controversial and say I still do not dislike the 2.8. It’s just different. Options are good. I happen to think that the D shot earlier wouldn’t be made any better by using the 1.4G.

So there you have it. I am a serious astrophotographer - landscape - portrait - wedding shooter all rolled into one and this still seems to work for me. Bear in mind for astro work in isolation there are better options, also consider that I have access to a 14-24/2.8S on my Z8. I keep the 1.4 for the aperture boost on my D800/D810 for aurora etc. For portraiture, weddings, people; there is this lens, which still do this day produces a look which is undeniable in it’s beauty. This at the end of the day is what I am all about. Not the spec sheets, the calculated MTF graphs, not the jargon, but the image rendering characteristics that I can plainly see with my own eyes. And boy do I see it with this one.

If you enjoyed this article, consider following me on Instagram or Facebook.

Steve

Using the Nikon D200 Alongside Modern Cameras

Introduction

I’ve continued to use the venerable Nikon D200 camera alongside the latest technology in 2024 and will continue to use it along side other great cameras of yesteryear. I have been using this camera for a few years now, following recommendation from a friend. I wanted to share some pictures from the last few years that inspire me to continue using this CCD colour king. If you read the very first blog post I made on this camera, you will know I value this classic body for it’s CCD sensor alongside it’s strict Colour Filter Array (CFA) which follows strict colour discrimination which produces naturally vibrant and colourful images out of the box, without oversaturating individual colours and hues. This allows for an overall very organic, ‘filmic’ looking output with sublime skin tones that I enjoy to this day. In fact, I’d go as far to say that with the right conditions and lens, I sometimes prefer the initial output from the Nikon D200 to other cameras, and contrary to some opinion, find it difficult to get a D200 ‘look’ from other cameras. Knowing how to use the D200 to get the best out of it is another matter, so we will explore that here along with some other tips and tricks. This will also be a bit of a ramble. Most people do not perceive, or seem to care much about colour in digital photography. As long as the sky is blue and the grass is green (no matter what shade or hue of blue and green that is), most people simply don't care one bit. Nobody cares, because if the camera they grab to shoot with has the sky coming out blue, with the grass remaining green, and caucasian people are not Alien-green, and skin colours somewhat resemble close to real life, they are happy. I think that colour is important in photography and I have noticed a couple of things about cameras that do colour well. Read the first article I wrote about the Nikon D200 here.

The Quiraing in dappled light, Nikon D200 and 18-55 Zoom. A one shot image with careful exposure.

The D200 CCD Sensor

The 10 Megapixel CCD sensor found within the D200 has some interesting characteristics. 10 MP is considered very low by today’s standards - however for most work I have to ask why people think like this. Nine times out of ten, I’d imagine most people buy the marketing koolaid. “You aren’t a man if you don’t shoot 45 megapixels!” However, consider that most do not print now, and most simply display images on tiny phone screens, so I ask again, why do we really need 45-60MP bodies? I say this as a user of such bodies. I have no choice in the matter if I want a modern, high dynamic range camera with all the bells and whistles that provides. I would say 36MP is the limit I would ever require, but hey, what do I know. The D200 sensor is a CCD technology, mostly phased out for the cheaper CMOS design found in most digital cameras these days, which offers better high ISO capability (and it does). The D200 sensor falls apart at high ISO, and I simply wouldn’t use it for such. You should be aware, the D200 sensor has quite a thick anti-aliasing filter. Because of this, it really benefits from using nice and sharp lenses, though as I will show, combined with some lens attributes / optical imperfections, one can use this to their own advantage to create a very specific look to the resulting pictures.

D200 with 85/1.4 Sigma Art. Shot in JPG. (A friend’s shot)

The above picture of my friend’s son demonstrates beautifully what I am speaking about when it comes to colour reproduction and skin tones. This is an impromptu picture which was shot in JPG image format, (it probably needs a little cropped off the bottom). Here we can see beautiful colour reproduction out of the box: so many modern cameras fail in this regard and I guess I didn’t notice how bad they do as I tend to shoot RAW nearly all the time for professional work. This shot could easily be further processed and dodged and burned for even more dramatic effect of this little moment captured. And how nice is this portrait too? It is so rich, doesn’t feel digital at all, and has beautiful skin tone reproduction. The subtle changes of red - orange hues in the skin tones are picked up beautifully here. The subtle red hue of the top is picked up beautifully. Some cameras struggle with basic colour reproduction such as this; red tones are pushed to orange, golden colours, skewed to yellows to name a few. Some of my modern CMOS camera’s really have issue with red colours especially in lowered light. My D810 changes red neon signs to orange every time. Even although the high ISO ability of the D200 is much poorer, I found it doesn’t do this sort of colour skewing that my eyes have become accustomed to seeing. As mentioned, this is a straight out of camera shot too! Hold that thought.

The Colour Filter Array - By en:User:Cburnett - Own work, CC BY-SA 3.0, https://commons.wikimedia.org/w/index.php?curid=1496858

Colour Filter Array

In digital imaging, a colour filter array (CFA), is a mosaic of tiny colour filters placed over the pixel sensors of an image sensor to capture colour information. Without such a filter in the imaging chain, the sensor is not able to ‘see’ the differing wavelengths of light, and thus would not be able to produce an eventual colour image. The illustration shows a Bayer colour filter array typical in many digital camera sensor designs. Each two-by-two submosaic contains 2 green, 1 blue, and 1 red filter, each filter covering one pixel sensor. (You can see therefore, that natively some sensors capture more green wavelengths of light easier - this sometimes presents itself as a problem when processing deep sky images - there’s more green to deal with). The colour filters filter the light by wavelength range, such that the separate filtered intensities include information about the colour of light. For example, the Bayer filter gives information about the intensity of light in red, green, and blue (RGB) wavelength regions. The raw image data captured by the image sensor is then converted to a full-colour image (with intensities of all three primary colours represented at each pixel) by a demosaicing algorithm which is tailored for each type of colour filter. The old CFA's were clearly built to prioritize colour fidelity at base ISO, whereas, at least in the initial generation of high megapixel sensors, they seem to have been weakened to let more light pass, to allow those sensors to achieve better high iso capability. This I feel may have affected their native colour output, compared to bodies like the D200, D60, D40, which had strict CFAs and CCD sensors which borrowed the kodak colour recipe from the film days. Modern CMOS image sensors tend to have smaller pixels (to increase resolution and reduce optics weight, volume and cost) and thus. less light gathering capability per pixel. A "weaker" CFA is used to partially compensate this. Do the same with a CCD and you will also get "weak colors." So the point is, the CFA is extremely crucial here in the imaging chain. There are plenty of CCD sensors that produce subjectively bad colour. This is where people go wrong with this CCD thing. It’s the CFA that has probably the largest say in the colour discrimination from the sensor and it just so happens to be that CFA’s a the advent of digital technology were more strict then some found in more modern tech. BSI CMOS has basically erased the light gathering advantage CCD sensors enjoyed years ago when FSI CMOS sensor circuitry still blocked part of the pixel. Although the  sensor itself is monochromatic, the colour  depends on more than just the CFA. There's an interpolation step required to convert the 4 measured RGBG pixels into  native colour after which a 3x3 color correction matrix produces sRGB.

A weak CFA over CCD can and will indeed suffer the same color problems as a weak CFA over CMOS.

Sensor Colour Response - SMI

From DXOMark - “The sensitivity metamerism index (SMI) is defined in the ISO standard 17321 and describes the ability of a camera to reproduce accurate colors. Digital processing permits changing color rendering at will, but whether the camera can or cannot exactly and accurately reproduce the scene colors is intrinsic to the sensor response and independent of the raw converter.

The underlying physics is that a sensor can distinguish exactly the same colors as the average human eye, if and only if the spectral responses of the sensor can be obtained by a linear combination of the eye cone responses. These conditions are called Luther-Ives conditions, and in practice, these never occur. There are objects that a sensor sees as having certain colors, while the eye sees the same objects differently, and the reverse is also true.

SMI is an index quantifying this property, and is represented by a number lower than 100 (negative values are possible). A value equal to 100 is perfect color accuracy, and is only attained when Luther-Ives conditions hold (which, as previously stated, never happens in practice). A value of 50 is the difference in color between a daylight illuminant and an illuminant generated by fluorescent tubes, which is considered a moderate error.”

NB: SMI depends more on CFA selectivity and AA strength than other sensor parameters, and since newer cameras with more pixels can do with weaker AAs, they can be a little less precise at handling colour in this regard.

Nikon D200 SMI Colour Response in Daylight. Courtesy of DXOMark.

Sensitivity metamerism index, or SMI, is essentially a measure of how well a specific camera under test lighting can reproduce the colour checker colour set. To give you an idea, under testing many phones sit around 40-50 in their SMI score out of 100, which is pretty low. Larger sensor cameras, aka DSLR’s and mirrorless designs tend to be much better, They start around 75 and go up. Scores in the 80s tend to be very good indicators of ‘good’ colour reproduction. Cameras valued for good color typically have high SMI values, while those known for poor color usually have low numbers. But not always. Anecdotal evidence suggests that some photographers feel that their older cameras deliver better colour than their newer ones (of course, a subjective quality regarding colour). In our colour images, it can be valuable to have a camera that is able to accurately pick up all the subtle tones and hues of individual colours, without oversaturating any of them like some other cameras do (new and old, I might add). This would be like someone noticing their camera did not saturate individual colours well in a scene, and another remarking that they could just turn up the saturation in post processing. However, in doing so, colours over-saturate before the more subtle colours saturate properly. That said, I mostly just go by look though in these matters. This stands to reason, because when I first picked up the D200 to shoot with it I immediately noticed what my buddy was saying. This is despite having a lot of cameras under my belt and using the latest cameras for landscape photography, astrophotography and other genres.

Let’s have a look at the DXOMark data on colour for the D200 camera. What we are looking at here is the daylight response to colour reproduction (CIE-D50) Click to see a larger view, or pinch zoom if on a mobile over the data. The D200 scores very highly, at 84 in this metric. Compare that to another body, not known for it’s colour reproduction quality - the D600. Note that it is scoring notably lower from the testing procedure at 77. Actually, the two Nikon cameras that top DXO's list for highest color SMI are the D40 and D60 which both scored 85 and 84 respectively for CIE-D50 and CIE-A. The only downside is they are very old bodies now and come with a worse autofocus system, and less bells and whistles than the D200 provides. They are definitely not built like the D200 either.

Nikon D600 SMI Colour Response in Daylight. Courtesy of DXOmark.

See here to find the full details on the ISO International Standard for Camera Colour ISO 17321-1. Feel free to look up SMI figures for colour for other cameras. Generally, the trend is, the lower that number, the worse it’s out of the box colour tends to be for the particular body under investigation. Curiously though, things have gotten interesting recently. At the advent of modern high megapixel cameras such as the D800, D810 and D850, there was a slight drop in colour performance if we look at this metric. For example the D800 took a notable hit at 78 on the SMI scale. The D850 scored a slightly better 79. The Z7 mirrorless reached 82, and now the Z8 I own got an 83! Only one point less than my beloved D200. However, as I wanted to describe, it is important to not just attribute colour performance to one number. The Z8 colour is very different to the D200 in the way it’s colours present. Different is the best adjective here. Neither is better, it really becomes a personal preference. This is indeed another point that I would make. I have realised that I am someone that loves to shoot different cameras, also for the experience in itself. To me, every sensor ‘draws’ differently. So even cameras that I have stated have ‘poorer’ colour than the D200, such as the D800, I love to use because I still like their output, for other reasons. It becomes a tool to task, or what I want to create type of thing. With regards to the D200, it does feel very film like in it’s reproduction. The colours feel older school, the thick AA filter mutes some detail too, the skin tones are gorgeous. The effect is, the D200 really feels like a digital-film camera hybrid to me in comparison to the modern technology. It is noted that the D200 can individually pickup and discriminate all the subtle hue changes and saturations of individual colours in an image. In trying to emulate what the D200 does natively with other cameras, tends to make particular colours go ‘nuclear’ with oversaturation, whilst trying to properly saturate the weaker colours in the image. I have noticed this over and over.

There are some problems with SMI, and using it in isolation:

  • As a statistical measure, it only gives us an average and doesn’t tell us about the distribution of errors.

  • If they only use the ColorChecker 18 color chart, then this is an amazingly poor sample. Really, there should be a better methodology using far more colors. What I find surprising is that manufacturers can’t even get these 18 colors right.

  • There could be a potential problem of them ‘gaming the system’ where manufacturers only work on getting those 18 colors right, ignoring the others, giving a deceivingly high SMI number. This is a big problem with artificial illuminants such as fluorescent and LED lamps, which are often designed to delver a high Color Rendering Index even though they still have poor spectra — and the CRI test is even worse than SMI, using only 8 sample colors. Lamp manufacturers lately rejected the use of the full ColorChecker chart, which is rather distressing.

  • I’m not to sure how good CIELab is as a color distance metric, although it is far better than Euclidian RGB distance.

  • This does not take ease of re-touchability of colors into account, which is related to color depth.  High color depth does not mean that the colors are correct, but it does make them more correctable in post processing. 

Looking at this in a bit more detail with a test scene, it all looks similar until we take a closer look. It proves the point that this isn’t really about CCD vs CMOS. It is more about, which camera has the stricter CFA with that sensor. Look at the D200 colours, then for example the D300 example below it. Green crayon, third from the left, look at the wrapper. It’s barely saturated compared to the D200 image. Same with the purple crayon wrapper near the centre. The D200 shows the subtle saturation of the hue, whereas the D200 shows a very washed out tone in comparison. This is true of many of the other colours shown here. Note that only the D200 has a CCD sensor here. The Canon 5D does well in this comparison because it appears to have a much stricter CFA than the D2XS or the D300, despite having a CMOS sensor.

Canon 5D - CMOS with strict CFA, D2XS, CMOS weak CFA, D200 CCD, strong CFA, D300, CMOS, weak CFA. Image used with permission courtesy of   Imaging Resource.

In the above scene, there is a subtle but noticeable colour difference; a ‘when you see it’ type of thing. The M240 image is on the left side. The Leica M9 CCD sensor with strict CFA is on the right. Here the author can't match the M9's rich rendering of the purple vine because the green foliage of the M240 image would go nuclear if he did. Yet we can see the strong saturation applied to bring the M240 image closer to the M9 has already unnaturally overcooked the weaker colors in the M240 walkway, yet it still doesn’t match it. Only the M9 seems to preserve the full dynamic color range of the scene. Also note that the M9 image shows more shadow detail in the gate than the image from the M240, despite still being a punchier, more contrasty image. You might look at this and think oh I see it but it’s subtle. However I see it across other colours too. Many cameras skew reds to orange, and golds to yellows, as well as undersaturating them, which is even worse.

Have a look at this image from dpreview.com : https://www.dpreview.com/forums/post/53185762?image=0

Here we can see four CMOS cameras. The D700 by far pulls out the gold tones the best. The D800 really skews this hue to yellow. The D700 has a much stricter CFA than the D800 does.

How To Get the Best from the D200

To get the best from the D200, and considering that it is an older body and sensor in terms of digital tech, we need to understand the nature of light is noisy. The inherent nature of light is such that in anything but the brightest sunlight, light comes bundled along with ample amounts of noise. Most of that noise is located within the shadow regions of course, but not all of it resides there, depending on the conditions. We don’t see any of this however, as our visual system is not evolved to require to see or care about this, however it is the reality. (Consider that the noise present along with light is different from shot noise, which is the noise generated in capturing and processing the signal within the sensor and associated tech, essentially the noise generated from the electronics within the camera). Why am I labouring so much on the basic physics of light here? Because it is crucial to understand this, and to realise that the best way to deal with the D200, or any camera is to properly expose to the right. Ensure that everything is pushed as far to the right wall of the histogram before overexposure occurs, for the best overall fidelity. (This is tricky in some ways, and sometimes you might have to bracket exposures). In addition, the second layer of complexity comes about when we realise that the histogram on the back of the camera is built from a jpg preview - meaning it is a rough guess of the actual RAW data at best. It is however, all we have got, and with experience, it is a useful tool. Just know that sometimes it will say you have clipped, when you have not. (So never delete a shot because of this, at the scene). The D200 files cannot be pulled as easily as files from class leading full frame image quality camera’s such as the D850, Z7ii, Z8. Also, since the D200 is a smaller sensor camera than the full frame cameras I use alongside it; I also have less latitude in terms of dynamic range, over 3.5 stops less at base ISO:

7.79 Stops of Dynamic Range for the D200 vs 11.32 for the Z8, another camera I also use (at base ISO).

Because of the reduced malleability of the RAW files coming from the D200 camera, and it’s lowered dynamic range as shown above - it is important to maximise each and every exposure. I do this by using good shot discipline. I suggest clicking the link to learn more, however one should understand that using base ISO is absolutely crucial to this concept.

Consider Processing in NX Studio

NB: Note that I use Lightroom most of the time for Raw conversion and processing, along with Photoshop. Despite this, Nikon’s free to download NX Studio software really allows the D200 to sing, and display colour the way Nikon intended it. It is important to note that adobe won’t be doing this accurately with their simulated picture controls. NX Studio really does create some magic with the D200 and some other cameras. Whilst it is much less polished than Lightroom, I still often start conversions here, and export them to Lightroom as a Tiff to maintain accurate colour as Nikon intended when I really want critical colours. As much of a hassle as that may sound, for special pictures it is best to take time with them to get them just right. Nikon’s NX Studio is as I said, a little clunky, however you will find it will match the reproduction you are seeing on the monitor on your camera better than adobe or any other software will display. Have you ever noticed that Lightroom’s rendition of your image looks miles away from the back of the camera? This is why (it would also occur if you had different picture controls on camera vs the software, of course). I highly recommend using NX Studio, especially for a colour king such as the D200. So often in lightroom I find things like the vibrant red colours appear as orangey hues in LR, however in the Nikon software they are spot on. Easy solution…open those Raw files in NX, give them a very basic minimal process, and export them as a TIF and continue in Lightroom / Photoshop. Below is a very quick and dirty test. I’ve shot at ISO 400 (not an ideal test but demonstrates my point here fine - this is the highest I would ever push this sensor - I have plenty of cameras that do high ISO well) and shown that the LR conversion (right) skews all the red and orange hues to pinks which are not accurate to my desktop editing PC lighting). Notice also, that on the right side, (LR conversion) much less detail is seen in the glass reflection than on the NX conversion on the left side. There are other differences other than just colour when we use different software to process - notice the severe blooming around the ram sticks on the LR conversion, not present on the NX picture? This lens will do this, but not to the amount that the LR edit suggests. I will add more here in daylight at base ISO when I get the chance, however it is important to stress that software plays a part in this also.

Why Shoot with a D200?

Colour and Skin Tones. As stated, this body has a very unique approach to colour reproduction, and in my opinion produces just sublime skintones. It’s Colour Filter Array (CFA) is extremely strict relative to most modern CMOS style sensors, built to be able to deal with high ISO better; (they let more light pass to be able to do this). In doing so, many argue that it affected colour, which was better on the old bodies such as the D200. Better is of course a subjective term. I have heard many explain that they can make any RAW file look like it came from a D200. I have yet to see it. I tend to still shoot in RAW format on the D200; however there is a strong case, depending on your shooting style, to use JPG with this body. This is because the JPG ‘recipe’ is naturally very strong with this body. It produces fantastic JPG files in fact. The colours that this body produces may or may not be technically accurate to your eyes, and if you don’t see what is special; move along. I have always felt this body had something great to offer and I continue to use it. The other reasons I use it - I like to take a lightweight backup camera and zoom out with me. This body is lightweight; yet extremely well built. Carrying it with an 18-55 feels like barely any additional weight to me.

What Lenses to use with the D200?

I will go through in turn my most used lenses with the D200 body. There is a bit of a mixture in there, which for my preferences works well. First up is the must have 18-55 f/3.5-5.6 VR DX Zoom Nikkor

18-55mm f/3.5-5.6 VR DX Zoom Nikkor

Glen Tilt: The Autumn Scene, 18-55mm Zoom.

The Wave: St Monan’s Scotland. Nikon D200 with 18-55  Zoom

Rainbow at Pine Cone Point, Nikon D200 with 18-55 Zoom

The Forest, Nikon D200 with 18-55 Zoom

This is a must have all rounder which is surprisingly sharp considering it being a very cheap DX zoom lens. As you can see, it also produces beautifully pointed sunstars, a feature that I find lacking in so many modern lenses. Above all, this lens is lightweight, has fast and accurate autofocus and is small in stature, making it perfect for use with the Nikon D200 body.

Nikon 50mm f/1.4D

The next up is the Nikon 50mm f/1.4D prime lens. For me, it is important that it is the D variant, because the G lenses are much larger and don’t have the attributes that I use the D200 for. On a DX body such as the D200, bear in mind that a 50mm lens acts like an 85mm in terms of field of view one would experience with a full frame body, because of the smaller sensor size. This allows the 50/1.4D lens to be a lens to isolate a subject. The 1.4D lens produces a truly painterly image, in part due to massively under-corrected spherical aberration, which gives images shot near wide open a glow as we can see in the following frames:

Nikon D200 , 50mm f/1.4D @  f/1.4

As we can see here, the greatest effect comes at the widest aperture of f/1.4. The lens has tons of spherical aberration here, and with dappled light as seen here in this close up scene, is akin to a painting. The light is soft here. If the light was more contrasty or direct, you would see some chromatic aberration. We can see the sharpness is overall lower than most modern lenses.

Nikon D200 , 50mm f/1.4D @  f/2

Light really affects the perception of sharpness, so hold that thought, however we can see that by stopping down to f2 the lens is sharper and whilst the effect remains (good), it is not as prominent now. Below is another shot at f/2:

Nikon D200 , 50mm f/1.4D @  f/2

Nikon D200, 50mm f/1.4D @ f/5

It is important to note, that all of these images are shot at base ISO to get the best from the sensor. I very rarely deviate from this as previously mentioned. The 50mm f/1.4D is a dual personality lens. Stopped down it is bitingly sharp as shown in the final autumnal scene vs these wide open characteristics of the close-range flower shots above. I’d give a special mention to the 50mm 1.8D lens also. It is much cheaper and still and extremely good choice for a camera like the D200. Whilst not achieving a f/1.4 aperture, it actually has basically zero distortion. Very useful to have in a 50mm lens. Straight lines stay perfectly straight.

Let’s draw our eyes to another sharp prime lens, the 20mm 1.8G Nikkor in this summer waterfall long exposure picture that I made with my son:

Nikon D200 with 20mm f/1.8G

Nikon 20mm f/1.8G

The 20mm 1.8G gives a 28mm equivalent field of view on the D200’s Dx CCD sensor. I have grown to like this focal length quite a lot, as 24mm can be too wide and too ‘foreground orientated,’ pushing details in the background too far away. I have the 20mm 1.8G for my full frame DSLRs so it was a natural progression to test it out with the D200. I found that it was extremely sharp. This above picture is a x2 frame bracket which has been exposure blended using luminosity masking to balance the bright sky to the ground. I love the layers of focus in this shot in the foreground. Sometimes I look back on this one and wished that I’d move the camera ever so slightly left to prevent the blurred edge reflection in the foreground tree. Another part of me likes that it produces a slightly unsettling feeling to the picture overall. I also have very little room to maneuver before falling into fast moving water! (Always an important consideration when framing up, I find).

Sigma 35mm f/1.4 Art

Dealing with Crap, Nikon D200 , Sigma 35mm f/1.4 Art

I used a sigma 35mm f/1.4 Art lens for the above shot. I found the focus a little erratic when using this lens. This may just be unique to the Sigma as I have heard some reports of this on other bodies. If you are buying a 35mm prime specifically for the D200 I would look at Nikon’s Dx 35mm 1.8 lens. It’s small, lightweight and sharp, acting as a 50mm field of view compared to full frame cameras.

Nikon 24mm f/1.4G

Giving it a Trim, Nikon D200 , Nikon 24mm f/1.4G

I absolutely love using the 24/1.4G lens on all bodies. The subtle but beautiful background blur produces a great cinematic feel to images when close enough (as we should be) to our subject. This image here is a good example of this in practice on the D200.

Final Thoughts

Colour is something that is intrinsic to many great photographs and in my opinion should be valued and considered more than “the sky is blue=check, and the grass is green=check,” which is how a huge swathe of photographers consider colour in digital photography. I have placed into this article a lot of anecdotal and other evidence to try to show that there are differences between CMOS designed cameras with weak CFAs, and CCD cameras with strong CCDs. This obviously applies to CMOS sensors with strong CCDs, admittedly a seemingly rarer thing to come across; despite that the older Canon 5D achieves this accolade. I will attempt to do some of my own tests of the D200 vs the D810. When I get round to this I will add them to this article. So if you are after accurate colour in Nikon land, you can buy a D200, D40, D40x, D60 - they are all up there with an SMI of 85 (from DxO's Color Response tab) vs current cameras at less than 80 (D600, D800 and D4 all having the exact same score). The big win is how cheap these bodies are; they can be mostly found for peanuts, even in great condition. I highly recommend the D200, to experience that old school colour, accurate and beautiful skin tone reproduction and an overall ‘film-like’ look out of the box. You might even on occasion, find that the colour the D200 produces is better than that fancy-pants modern camera you spent thousands on!

Have a look here, when a youtuber did a comparison of the venerable D200 vs the modern Z7 camera and found with hilarious results, that most people by far preferred the images coming off the D200. New isn’t always better.

If you enjoyed this article, consider following me on Instagram or Facebook.

Steve

The Nikon D810 - Still A Class Leading Camera

Street Gaming - Nikon D810, 50mm f/1.4G Nikkor

Introduction

I have shot with the D800/D800E/D810 since their release (D810 now exclusively from this series and you will see why later), and have extensive experience out in the wild with these bodies (also with the D850 which you can read about here). Let us consider pure image quality. The D810 came out a decade ago in 2014. And you would think that things have moved on in a big way since that time with regards to sensor technology, and the resulting image quality one could get? Sorry to disappoint you, however if you shoot still scenes (or scenes that aren’t sports or very heavy action - and yes I include weddings as being absolutely fine with this body), don’t care about video and value great image quality, these bodies are still cutting edge, even today. Dynamic range has not improved, because with current tech there aren’t any improvements to be made here. We have had a little improvement at high ISO with regards to shadow noise in the latest sensors such as the Z8, but that’s it. Not a huge amount has changed. This isn’t really a disappointing revelation, because we know of course that the D800 and D810 can produce fabulous pictures from the great sensors they have hidden away inside them. In some genres that involve shooting in LED lit areas, it could be argued that the slower readout speed of these DSLRs is advantageous as these bodies do not cause banding in resulting images in those conditions that can occur compared with bodies without shutters, such as the Z8 and Z9. This is the case because sensors had gotten so efficient by 2012, that only tiny gains have been made since. In fact, with the D810’s ISO 64, base image quality at the bottom of the range remains class leading and ultimately the same with the D850 and Z7ii / Z8 camera bodies. I am still regularly using the D810, and I know of many superb shooters doing the same, because they understand these basic facts. Of course other things have improved, autofocus technology, liveview tech at night, frames per second etc. If these things don’t matter to you much, or you can shoot around these, then these bodies are still absolutely relevant in today’s camera world. I say this because there are so many out there in the wild, that can be had in great condition second hand for very reasonable prices compared to new tech, which along with learning how to shoot will do much more for a shooter than buying the latest mirrorless camera and fancy lens. The truth hurts; but if you cannot make a good picture with the D810, something’s up, and it ain’t the camera…

Nikon D810 with Sigma 14mm 1.8 Art and Comet A3 in 2024 over Scotland

Nikon D810: Key Specifications

  • 36.3MP Full-frame CMOS sensor (no AA filter)

  • ISO 64-12,800 (expands to ISO 32-51,200)

  • Electronic first-curtain shutter and redesigned mirror mechanism

  • New 'RAW Size S' 9MP Raw mode

  • Expeed 4 engine

  • Max 5fps shooting in FX mode, 7fps in DX (with battery grip + EN-EL18 / AA batteries)

  • 3.2in 1,229k-dot RGBW LCD screen with customizable color

  • OLED viewfinder information display

  • 91,000-pixel RGB metering sensor for advanced subject tracking and metering

  • Improved Scene Recognition System allows face detection in OVF mode

  • 'Split screen zoom' display in live view allows horizons/lines to be leveled precisely

  • 51-point AF system with new 'Group Area AF' mode (inherited from D4S)

  • New 'Flat' Picture Control mode for massive dynamic range capture (video-focused)

  • Auto ISO available in manual exposure movie mode

  • Zebra stripes for exposure checking in video mode

  • Uncompressed HDMI output with simultaneous recording to memory card

  • Built-in stereo microphone

Of all the specifications, most don’t matter in the real world. The D800 had it down. The D810 is more refined though, and benefitted from a correction of a major design flaw which I will discuss later in this article. There is another major point to make though:

ISO 64

ISO 64 is a magic ISO where one can feel free of dynamic range problems or constraints. Unfortunately was not available on the D800, only the D810 and D850, so it lost out on a tiny extra bit of dynamic range at base ISO compared to these two. Let me explain something about ISO 64 to the uninitiated. If you shoot Sony, Canon or Fuji, you are simply missing out. It’s ironic for the Sony shooters. Nikon sensors are made by Sony; however Nikon tune them and get more out of them than Sony do (and a lot better colour). ISO 64 is a landscape photographers dream with so much latitude that exposure brackets are needed less and less. NB: Of course, still needed in certain situations. Note that the D800 only natively goes to ISO 6400, although this really doesn’t have any bearing on good photography as you will see.

Access to a Vast Lens Catalogue

All f mount bodies have access to an expansive lens collection from Nikon and other third parties such as the wonderful Sigma, Zeiss, Tamron, to name a few. There is simply no way that you won’t find peace in the vast amount of options out there. Special mentions go to the Sigma 40mm f/1.4 Art - a very special astro / landscape lens which is still class leading to this day. The 28mm 1.4E Nikkor on f mount, which again is utterly superb still. The 24mm f/1,4G dual personality lens which gives a beautiful softer wide open rendering and an ultra sharp stopped down landscape scene. There are so many options to choose from that you simply cannot go wrong.

Dynamic Range

Dynamic range is the single biggest marker of where a camera is at with respect to full frame bodies. It is also one of the single biggest reasons I am still using the D810 even today. Let’s take a look at the data from photonstophotos.net:

D810 vs Z7ii Photographic Dynamic Range

(Tip: If you have trouble seeing these graphs on mobile, just pinch zoom into them). Well this is embarrassing. It appears that, aside from a megre bump above ISO 400 in dynamic range terms, it is a draw here. (99% of the time, you would never see this difference anyway). I choose the Z7ii and not the newer Z8 as it technically has the highest dynamic range in Nikon’s current lineup of 11.59EV). Now let’s look at the D800 vs the Z7ii:

D800 vs Z7ii Photographic Dynamic Range

See what I mean here? There is no difference at all here in reality. They are essentially, completely the same! More fool us for pouring more money into the coffers of the camera companies.

Now I want you to think for a moment, consider that many will be saying:

‘Oh well, but the newer camera has X or Y feature that makes this or that easier and the like’.

That might very well be true, however if we are really honest, at the end of the day, when it comes down to it: the most important thing about a camera for these purposes is how true to life it can be, and how eager it can be to capture a great range at the scene, and more so, have a huge RAW file malleability built into the files for post processing. I cannot stress this enough. You could completely ruin an exposure by taking it -5 stops underexposed and still make a perfectly usable image: such is the RAW file malleability in these cameras. I’m serious: if you have never shot at ISO 64 on a D810 then you need to experience it. I see no real difference between the D810 and the D850 in this regard, of which I wrote recently about in the Nikon D850 article I wrote:

Not only this, the RAW files are so malleable (which these charts don’t necessarily tell us) in post processing. You can pull a file any which way and it holds up. It saves you if you screw up when taking the image. The shadow latitude is absolutely insane. One can expose for the highlights, and drag the shadows up to get a realistic image, without horrendous noise or banding like with other brands. It is simply ridiculous how good this sensor is.

It is of course best to have good shot discipline, however the fact that we can do this is extremely advantageous to a photographer working in contrasty light.

A demonstration of Raw file Malleability at Gourock, Scotland. D800, 24mm. This is a singular exposure, no bracketing was required luckily, since this is over 6 minutes of exposure.

ISO Invariance

The D810 is essentially ISO invariant. Shooting at higher ISO in camera, is the same as shooting at lower ISO’s at the scene and raising the exposure in post by the same amount. (Above shot was taken at ISO 400, f/1.4 and 1/60). The shot came out ultra dark - essentially ‘underexposed’ in the classic sense. I then processed it to how my eyes saw the scene. Invariance is generally a great feature of a sensor and it if course helps to save you in times if you ever screw up. It means you can shoot at much lower ISO’s where high dynamic range and image quality exists - less noise, better colour, and in post brighten intelligently whilst retaining all the benefits and none of the drawbacks. Well, except the images might look a little dark on the in camera monitor, but no matter. There are some caveats to this method however. Extreme pulls, such as the above shot, need some consideration. I shot this at ISO 400, following the ISO invariance method. I ended up with a clear purple band down the right which I removed in post. I wouldn’t have gotten this if I had shot above 3200, where the deep black noise reduces:

Shoot above 3200 if you know you are gonna need to boost an ultra dark scene 5 stops. You’ll get less magenta and amp glow.


Sensor Resolution

The D800/D800E and the D810 all share similar 36 megapixel sensors. The D800 is the only one of the three that includes an anti-aliasing filter sitting atop of the sensor to reduce possible problems with moire and false colour. This approach has sort of gone by the way side in modern times, with most cameras now not requiring to have said filter. It really only requires a little more sharpening than a camera without an AA filter, such as the D810 and D850. I tend to keep files pretty under sharpened as I find that these days in the photography world most are overdoing this; which creates ‘thin’ digital looking results. 36 Megapixels is in my opinion, the right balance of resolution vs good colour and noise reproduction. These cameras produce noise as close to film grain as I have seen from any camera. The D810 is especially good in this regard. The D810 has improved shadow noise from ISO 400 upwards over the older D800, which is actually more beneficial. The truth is though, these three are all excellent across the native ISO range.

Autofocus and FPS

The autofocus in the D810 is what I would term ‘more than capable’. The D810 can’t match the D850 in sports, but this was never really my area of shooting interest. I have shot some equestrian events, and some motor racing and have always been able to nail it on the D810 and make pictures with fast lenses, the same goes for weddings, which I have shot extensively, again no problems there for that genre. I am a bit of an ‘artistic’ shooter when it comes to that, and have long since got over the pixel sharpness thing I used to obsess over and I now look at the whole image. This doesn’t mean I accept constantly blurry pictures, but I do sometimes still use a beautiful picture that is a mild focus miss. I also slow down the shutter to create blur for weddings at times. (The same way the Cinematographer uses shutter speed creatively - this should never be discouraged). That said, close fast moving subjects on the D850 have a higher hit rate with these cameras. When it comes to speed, these camera’s are a little pedestrian compared to the modern spray and pray offerings, however I find 4FPS and 5FPS fine (mainly because I actually don’t use these modes except on the rarest of occasions). I find it tiring enough to cull and edit only the best of shots without trawling through thousands of pictures captured in this manner. Leave that for the sports guys!

Optical View Finder Advantage

Mirrorless tech now is a ways away from the first major iterations: for example the Z7, in that camera’s like the Z8 have hardly any or no perceptible lag when shooting. Despite this, there is still a case to be made for a large and bright optical viewfinder found in Nikon’s D8xx bodies. There are several things I would touch on here. The D8xx series features 100% frame coverage for composing. Also, there is absolutely zero lag with these designs; light comes in at the speed of light through optical finders. Secondly, in genres such as wedding / portrait and others that involve long staring contests of the photographer looking through the finder, optical finders are still relevant. Think about this for a second. DSLRs do not need to power an electronic feed for you to see and compose your image. You can have your settings down and simply wait for the decisive moment. Doing this with mirrorless involves chewing through batteries simply waiting on the picture. This may or may not affect a shooter; however it is important to consider. The last advantage can also for some be seen as a disadvantage by some. For me, it is nice to observe subjects without any electronic representation. As long as one knows how to meter and understands exposure, this is generally not an issue. Shooters now are growing up in a world of smartphones, where they need to see what they are going to get on the mirrorless screen in order to make a picture. However, even things like brightness can throw people shooting like this off, so it is best for them to go back to basics and learn how to meter and use histograms. Of course, the other side of this coin is that in low light, mirrorless cameras can have the advantage in that they can electronically boost the signal. When you think about it, since DSLRs have liveview, this should have been technically possible with DSLRs too, just not via the optical finder. Lastly, I love the built in viewfinder blind in the D8xx cameras; perfect for long exposure work.

Electronic Front Curtain Shutter

EFCS is designed to help reduce vibrations from the shutter. With the electronic front-curtain shutter, exposure is started electronically after the front curtain opens; exposure ends when the rear curtain closes. Only the D810 and D850 has this, however I had no issues with the D800, which doesn’t offer this function. The D850 went further to create a completely electronic way of shooting, allowing less wear on the shutter compared to the D800 and D810. Obviously this does put less wear on the shutter at night. Astro often involves many, many exposures, particularly if doing time lapse photography. Using this mode means the shutter stays open and the shutter actuations count will not rise with exposures. The electronic shutter is a huge boon for this type of shooting because of this, potentially prolonging the shutter life of the camera as well as dealing with any vibrations, unfortunately it is only available in the D850 though. It is definitely not something to loose much sleep over, however.

LCD monitor

The LCD monitor is extremely high resolution and adjusts to a level that it can be used in bright sunlight. A special mention goes to the D800, which has auto brightness, like all phones do. It seems Nikon considers it’s user base confuses brightness with actual image exposure perhaps and removed this function? I dare say many do, but it should still be an option in the D810, D850 and all the mirrorless bodies but it is gone. I on the other hand love this function from the D800 days. My only complaint is that I would prefer a dual axis tilt screen, like the Z8 and Z9 now have. (This becomes really useful when doing low lying vertical orientated shots, especially at night). The D800 and D810 LCD panels are fixed flat to the body. Arguably this does increase resistance to breakage though.

Pop-Up Flash and Hotshoe Flash Functions

Pop-up flash is extremely useful as fill-flash at times. Used properly, it can negate the need for a larger speedlight. It can also be used to control off camera speedlight flashes. The hot shoe on the D8xx series of cameras works perfectly with Nikon flashes, or my preference, the Godox range which I personally use. Having a good speedlight or two is really essential for any type of portrait work; and although I do not use them for every genre of photography, or every portrait type shoot, understanding how light works on a deeper level is always going to elevate your work. The fact that the D8xx series integrates so well with these, is a huge boon to the shooter. I was sad to see the D850 loose the pop up flash, by the way.

Mode Dial, Top LCD and other Buttons

The Nikon D8xx range has the best implementation of this in DSLR land. Special mention to the D800 which also places a nice metering dial on the back of the camera, right where it should be, with the ability to switch between matrix, spot and evaluative metering easily. The D810 and D850 has this moved to the flash hump, and I don’t like it as much. This was in part I expect, due to the fact the D810 inherited a new metering mode - ‘highlight’ metering. It can be customized in menu, which I did as I find it cared too much about specular highlights too much. I tuned it so that it would expose bright white clouds as far right as possible on my histogram. The top LCD screen may look like an 80s Casio watch, however I would not be without them. In fact, they are kind of cool, and better yet, they can tell you a ton of information about your settings from a quick top down glance. As mentioned, the D810 has a larger thumb support and I personally find it more comfortable in the hands; however I find the button layout slightly better on the D800. So it’s horses for courses, one wins a little in one area over the other, however they are both really good in most respects. As mentioned also, I do wish Nikon kept the ‘auto brightness’ feature on the D800. You can see the sensor for it on the back above the liveview mode switch. I wish the D810 I use had this now.

Nikon D810 Build Quality

D800 Chassis - A great deal of magneium alloy, however looks can deceive. It had a fatal design flaw

Call me old fashioned, however I like to buy products that have been solidly built and can if required endure the rigors of modern life. The D810 certainly qualifies in this regard. Yes, it is not small, and are quite ‘brick-like’ however overall I have never had one skip a beat in use. Just look at the D810. It’s full magnesium alloy chassis is extensive and is a massive superstructure that all the main parts are attached to. This gives it a great longevity, as it benefited from a design flaw correction in the D800. Yes eventually the shutter may give out, but there are still places that will repair them (and Nikon), and there is a plentiful second hand market. The D810 feels great in larger hands, and feels much more comfortable because of the deeper grip compared to the D800. (Note that the D800’s evolution was perfected at the time of the D810-D850. The D800’s shallow thumb rest and shallow grip for the right hand and fingers makes it less ergonomic over prolonged periods of use).

The Build Quality of the D800 Let it Down

The D800 really pushed the envelope when released. It was the first true high megapixel sensor in a 35mm body ever. Like so many things that push boundaries; mistakes were made, and sadly some of them, were serious.

The D800 should have had seriously good build quality, but there were engineering problems with the way it was built, despite the amount of metal used in it’s construction. The D800 has had major issues with cracked subframes (a metal structure which runs around the LCD monitor on the back and extends down above the tripod plate which keeps the sensor and AF system - mirrorbox in alignment - a serious part) due to a design flaw. This means using the tripod socket could cause a fulcrum effect to occur when using heavier lenses like the 24-70/2.8, because the tripod socket was not directly connected into the chassis. If it were, it would be a better design. This caused users to experience cracked subframes from the tension this caused internally. On examination it was found to be too thin a structure and had sharp corners (the cracks nearly always occured at these areas too). This combined with the one’s examined by a metallurgist, which were thought to have a poor pour, these were always destined to fail in this area. The problem is, D800’s can have this broken frame internally with no visible damage externally.

Not only this, early D800 batches suffered from broken 10 pin remote terminals, whereby the socket would fall into the body and Nikon was still initially expecting the customer to pay for this (it happened to me, but I forced them to cover the cost). I actually had mine do this and nikon rectified it under warranty when I sent it in (this only seemed to affect early built models, but they never really admitted this either). There was also the left autofocus issue, which plagued early bodies, causing mis-focus when using the far left AF sensors in the viewfinder. Eventually they did acknowledge this issue after the internet blew up about the issue; they really had no choice. The frame issue and the socket problem flew under the radar for a long time because the nature of it was more obscure and it took time to reveal itself. Make no mistake though, Nikon knew, and fixed this silently in the D810…

The problems really mounted up for Nikon with the D800 (which still seemed to be an excellent seller for them - because there was nothing else like it at the time), and they failed to acknowledge this broken frame thing they kept seeing in service centres, wrongly claiming user error and ‘impact damage’ as the cause. It should not be possible that a light knock externally could have caused this to break internally, especially when all the marketing stated how rugged and secure the build of the camera actually was. From examination of many broken frames it was thought to be tensile forces that were the cause of the breakages. Many camera’s examined by Nikon had zero external damage. No chips, no marks, camera’s in mint condition; yet this frame was broken and was potentially, sometimes the cause of autofocus problems.

You can see why my recommendation has to be the D810, or of course the fantastic D850 because of these problems. Even if you find what seems like a good D800, and yes it is a great camera when it is working, however it can be difficult to know what you will get when buying second hand, and external examination will not reveal the issues mentioned here. I have tried two second hand mint condition D800’s and both had the left autofocus issue to varying degrees; or just general screwy autofocus precision compared to my D810: they might even have this coming from the cracked subframe which could have drifted the left side out of alignment. D’oh Nikon! This should never have happened with a camera maker this experienced, and it is worse they never properly admitted it, I assume due to embarrassment / financial repercussions it would cause them.

This is why I recommend the D810 or D850 only now. The D810 was redesigned to have a stronger subframe, and a plastic mirror box so that if anything breaks from a large impact (which by the way would be externally visible), the part will shear away and have a much greater chance of being repairable because it will have much less chance of screwing up the internal alignment of crucial parts. Initially the internet experts thought this was a bad move before they fully understood the problem, with the ‘metal is better’ thing coming out. For more issue on this cracking subframe problem, and pictures which show the issue, (which most of the time makes the camera irreparable), click here to read the in depth discussion which eventually reaches conclusion. The word is out, the D810 is solidly built and is absolutely and unequivocally proven in the field; whereas the D800 is best avoided now, unless you already have one that you are happy with and is working, and you have checked for these issues.


D810 for Weddings. Shot with D810 and 135 f/2 DC Nikkor

Use Cases:

Landscape Photography

An obvious genre for the D810 - and tried and tested by many for years. You are in good company if you participate in this genre. For 99% of shooting, you will be at ISO 64. As I have shown, with good lenses you aren’t missing anything from the modern technology. This means you can do exactly the same thing as the modern cameras for a quarter of the price or less.

Astrophotography (Landscape / Deep Sky)

I have a tutorial on this here with the D850 used for years to photograph the deep night sky. I wouldn’t say I don’t recommend the D810 for night sky work. I can’t, because I am still using the D810 regularly for this purpose in astro landscape style shooting. The caveat is, that the D810 camera is a little ‘night-blind’ - a trait shared by most DSLR cameras that only got fixed in mirrorless (it took til the Z8 for Nikon to work this out also, talk about slow!). This only affects composing and framing up the shot / focus, in the sense that it makes these things a bit more difficult than with a modern camera. It doesn’t affect the great pictures I see from many great astro and landscape photographers though. It absolutely has no bearing on the end pictures (unless you screw those parts up). The D810 therefore doesn’t see the night sky like modern mirrorless cameras or phones do. You will be picking out a few bright stars to focus on and taking test shots for composing. This isn’t as bad as it sounds - it’s the way we always used to work at night. It’s only the modern technology that came along and spoiled us. That said, you should be aware of it, and camera’s like the Z8 are much better in this aspect. The D810 like the D800 does not have a full electronic shutter mode, so timelapse shooters etc will add to their shutter count on long sessions, which is another thing to be aware of, at least compared to the D850.

Portraiture / Weddings

Another obvious win for the D810. Yes it may lack eye AF, but you really don’t need this, not really. Image quality for portraits is excellent, skin tones are sublime and the files are so malleable as with the other genres, this camera is tried and tested. You also get to look at your subject in real time without an electronic veil applied. Less tiring on the eyes, no?

Macro / Copy work

I am not a macro shooter per se, however I can see no reason why the D810 would not be perfect in such disciplines. The high quality, high megapixel sensor will take care of all needs in these situations.

Final Thoughts

The D810 was around £3K on release in the UK / Europe. Now one can be picked up from around £500-£700 depending on condition. I recommend the D810 if you are a deliberate shooter and aren’t worried so much about tracking or fast sports, and especially if you want a pop up flash which is very useful even to control speedlights etc. The D850 is better suited to sports of course. What’s shiny and new one day becomes old as this camera has, however it functions just the same. D810’s still work great, despite their previous owners feeling they needed the latest and greatest. How many of us have been guilty of falling for the marketing? Spend less time on chasing the latest equipment; especially when it comes to tech such as the D810, because as I have shown, it is just as good (with some caveats) to the newest mirrorless tech. Be free of the current trend in mirrorless, in that to get better readout speed for things like the EVF and autofocus system, that they have actually worsened image quality, by simply shooting a DSLR! I am not a shooter who has to come down on one side or the other. I don’t love DSLRs and hate Mirrorless tech. This would be a naive view to take, and besides, I use a Z8 for astrophotography. I select the camera to use out of a ‘Tool to Task’ approach, and sometimes, just for the fun of showing others that newer is not always better,* and that these cameras never stopped taking great images.

*Definitely not better for the wallet.

If you enjoyed this article, consider following me on Instagram or Facebook.

Steve